VEED for beginners: add automatic subtitles and save an MP4
Upload through Edit Video, generate captions with Auto-subtitle, correct the text and styling, then save through Done and Download. Includes official interface examples.
Last updated
Menus and supported features can change. Compare the source-check date below with your current app version.
Use this walkthrough to upload one spoken video, correct its automatic captions and save an MP4 with visible subtitles. The instructions use VEED in a computer browser.
The animated demonstration and two screenshots below are official VEED examples, not recordings of our account. We checked the documentation on October 26, 2026, without uploading media, generating captions or making a purchase. People and captions shown belong to the provider’s examples. The older style screenshots show Export; the current export help article calls that step Done. Every image links to its source.
1. Open Edit Video and upload one clip
Open the official VEED website, sign in and select Edit Video from the dashboard. Choose a file or drag it into the upload area. Your video should appear in the preview and timeline before you proceed.
For a first practice session, choose a clear 15–30-second recording that you have permission to use. This is a suggested exercise length, not a service limit. A short clip makes checking each sentence easier. Choose spoken material rather than music alone, because this exercise needs words to transcribe.
Keep a note of the opening and closing sentences. You will use those as simple checks when opening the finished file. Starting with one clip also makes it easier to identify which piece of audio produced a particular caption.
2. Generate captions in Subtitles
Open Subtitles, select the spoken language and choose Auto-subtitle. For multiple clips, distinguish the selected clip from Full project. Start with captions in the original language rather than adding speaker detection or translation. Once processing finishes, you should see editable subtitle text.
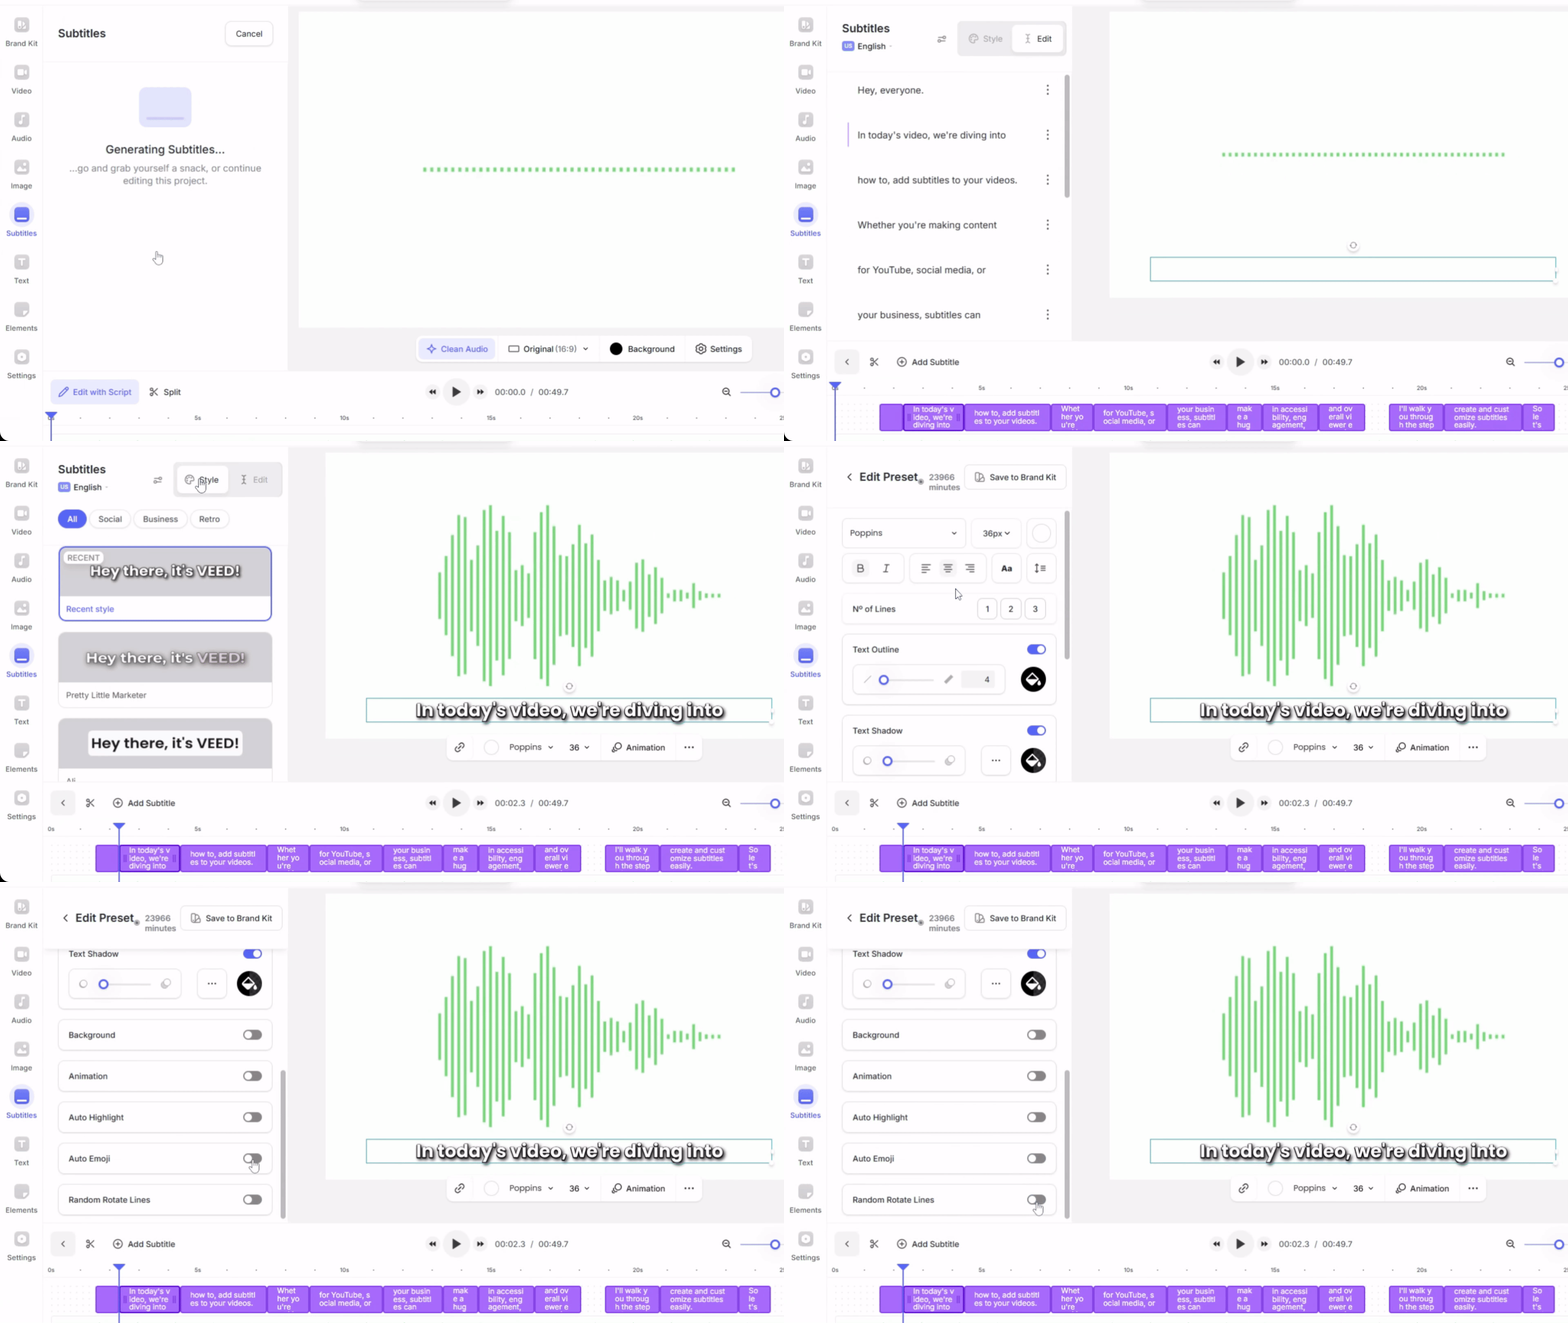
Treat the generated text as a first draft. Listen for names, numbers and negation: losing “not” can reverse the meaning of a sentence. The right reference is what the speaker actually said. Avoid adding information simply because it would make a sentence sound more polished.
3. Correct the text before decorating it
Click a subtitle line to edit it. Check orange low-confidence words first. If timing needs adjustment, open the three-dot menu beside a caption and show the timings. Replay the corrected section to check that text follows the speech.
Begin by correcting one sentence and playing it back. This gives you a manageable way to see where the edit appears. Then continue through the clip. Check spelling and sentence breaks, particularly where the speaker changes direction or pauses.
A success indicator does not establish that the transcript is accurate. Compare the first, middle and final sections with the audio. Long captions may also be difficult to read at the speed of the recording, even when every word is correct.
4. Choose a readable style
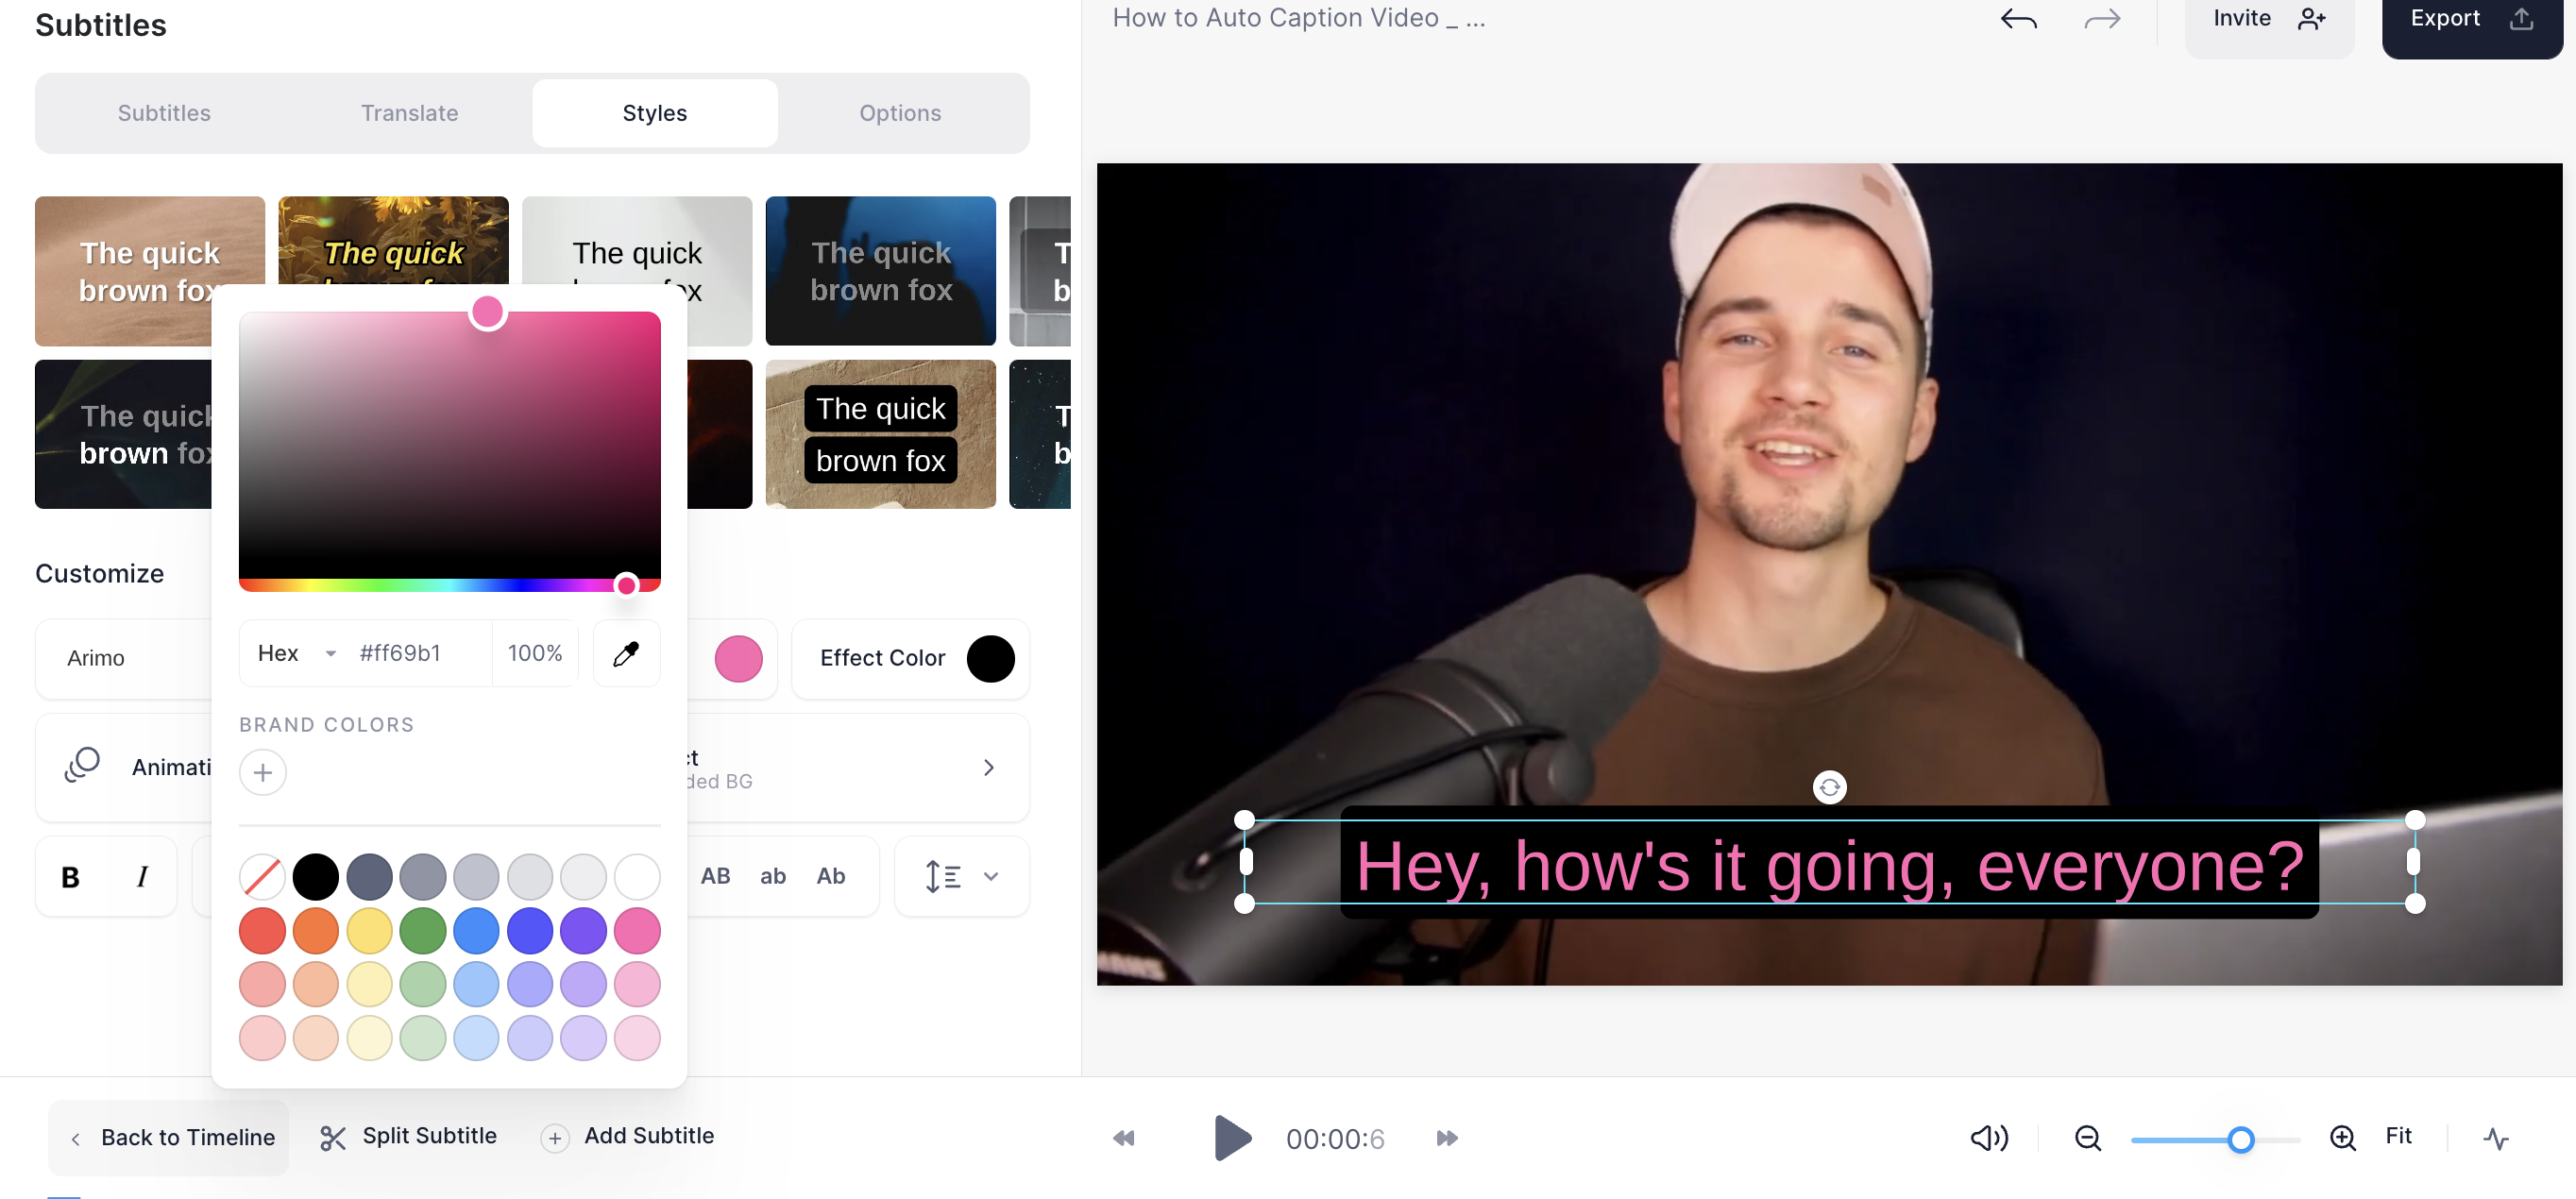
Open Styles, select a preset and use its Edit controls for font, size and color. The older official example below shows the Text Color picker. Use the equivalent style controls in your current layout, checking the preview after each adjustment.
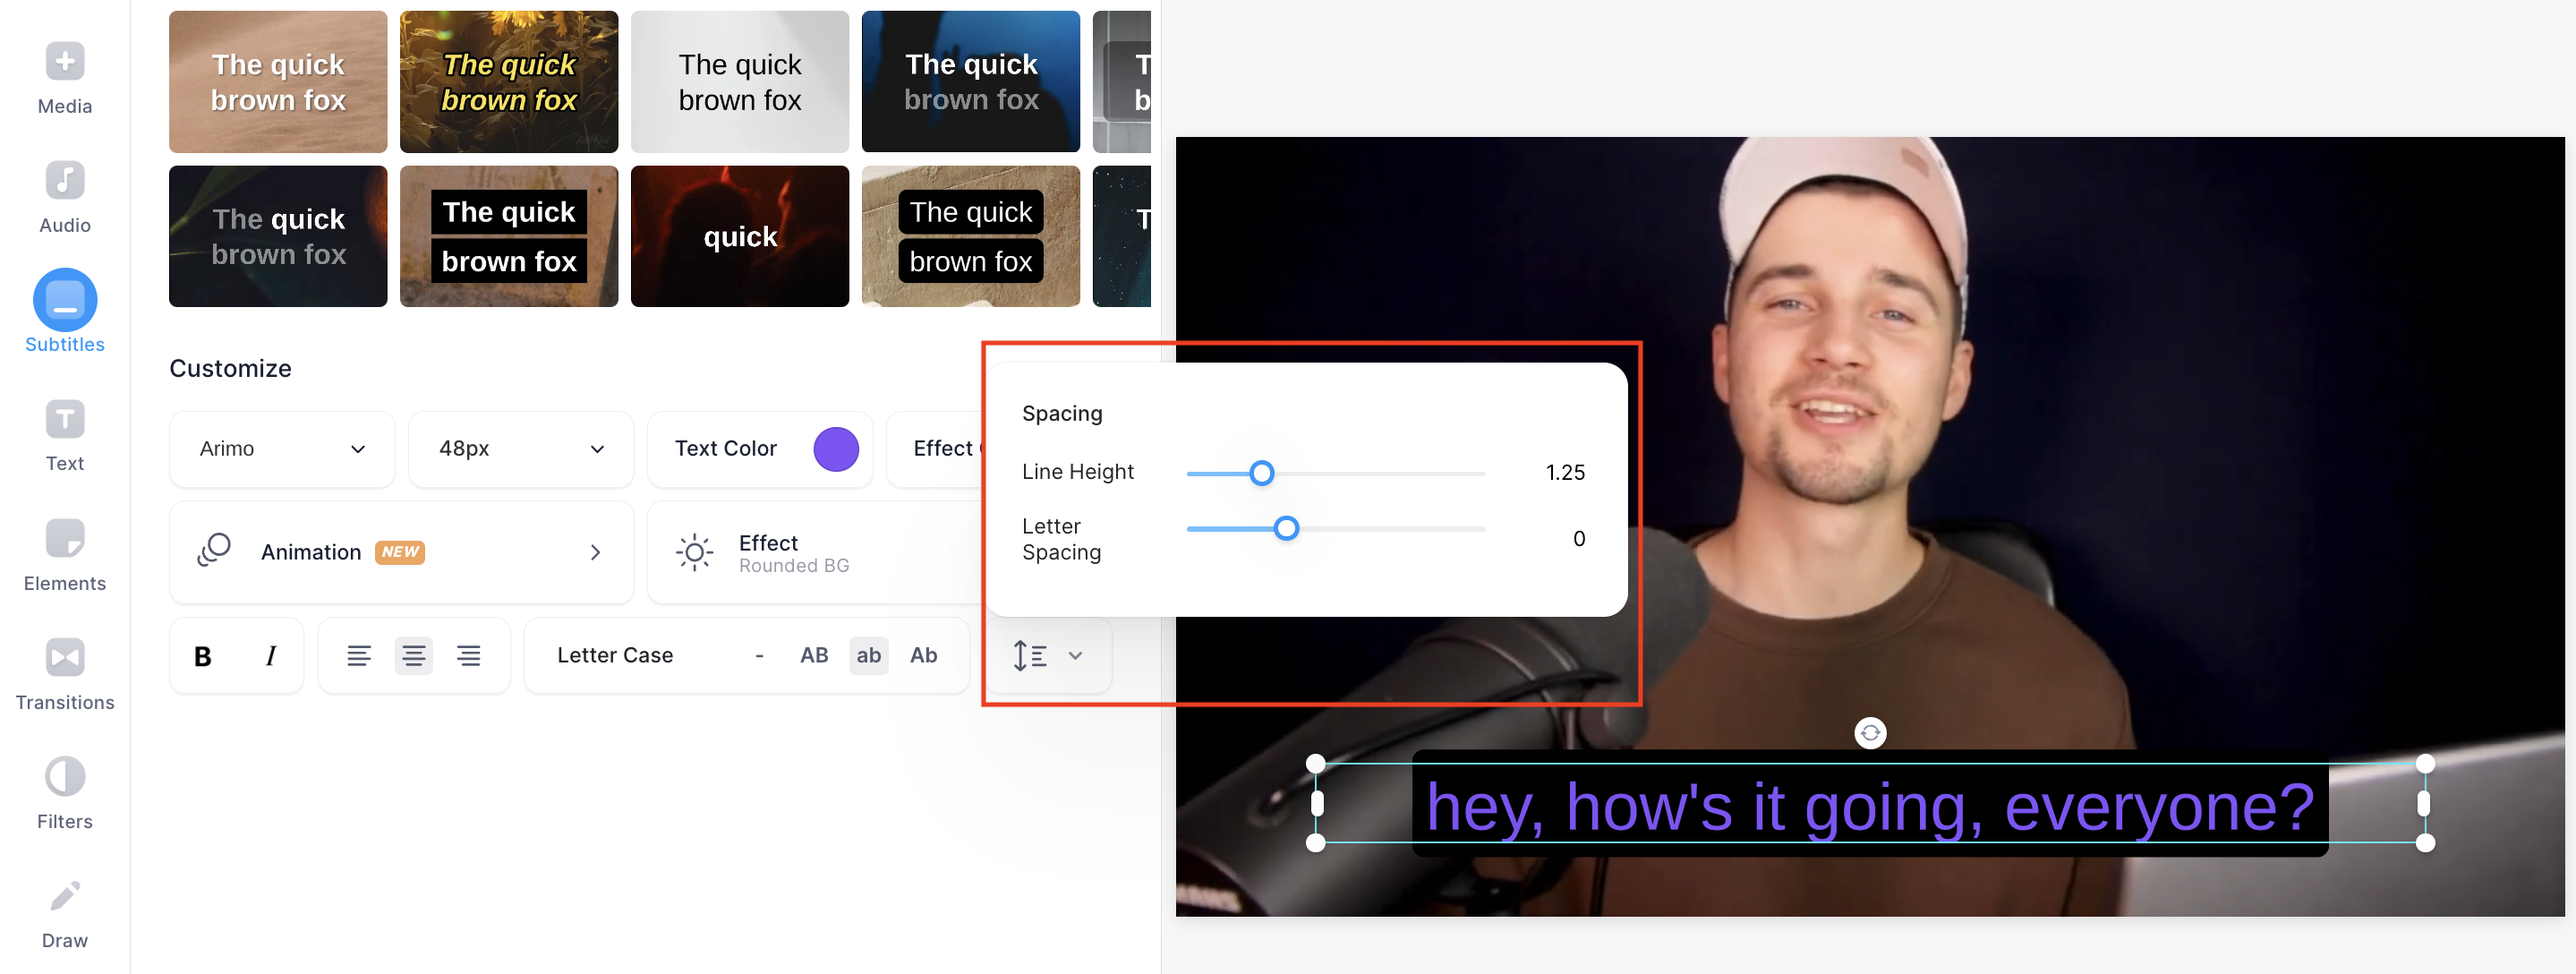
The Spacing example illustrates line and letter spacing. Start with font, size and contrast; adjust spacing only when needed. Changing one setting at a time makes it easier to understand why a caption became harder to read.
For a vertical video, check whether the captions remain readable on a small screen and whether they obscure the face or object being explained. As a final editorial check, mute the preview and try following the message from the captions alone.
5. Save and inspect the MP4
Open Settings → Export Settings, check the available quality, then choose Done at the upper right. After rendering finishes, use the video page’s Download icon → MP4. Open the saved file and check the opening, middle and closing captions. A project in the editor and a downloaded MP4 are different deliverables.
Check current pricing and limits before committing to a longer edit: free exports can have quality and watermark restrictions. Changes made after export require another export to appear in the new file. The official export instructions explain the saving path.
If you also need a separate subtitle file, the documented path is Subtitles → subtitle settings icon → Download → SRT, subject to plan availability. An SRT stores caption text and timing, not video, audio or font styling. It is a separate output from subtitles visible inside an MP4. Read the SRT help article when a receiving platform asks for that format.
Sources & further reading
- https://support.veed.io/en/articles/11172739-how-to-add-subtitles-to-your-video-automatically
- https://support.veed.io/en/articles/10531327-how-to-export-your-project
- https://support.veed.io/en/articles/11884721-how-srt-files-work
- https://www.veed.io/learn/how-to-add-subtitles-or-captions-to-a-video
- https://www.veed.io/pricing