PhotoCraft tutorial: make a promotional image with a photo and a title
A documented, six-step guide to make a promotional image with a photo and a title, with source screenshots, editable files and output checks.
Last updated
Menus and supported features can change. Compare the source-check date below with your current app version.
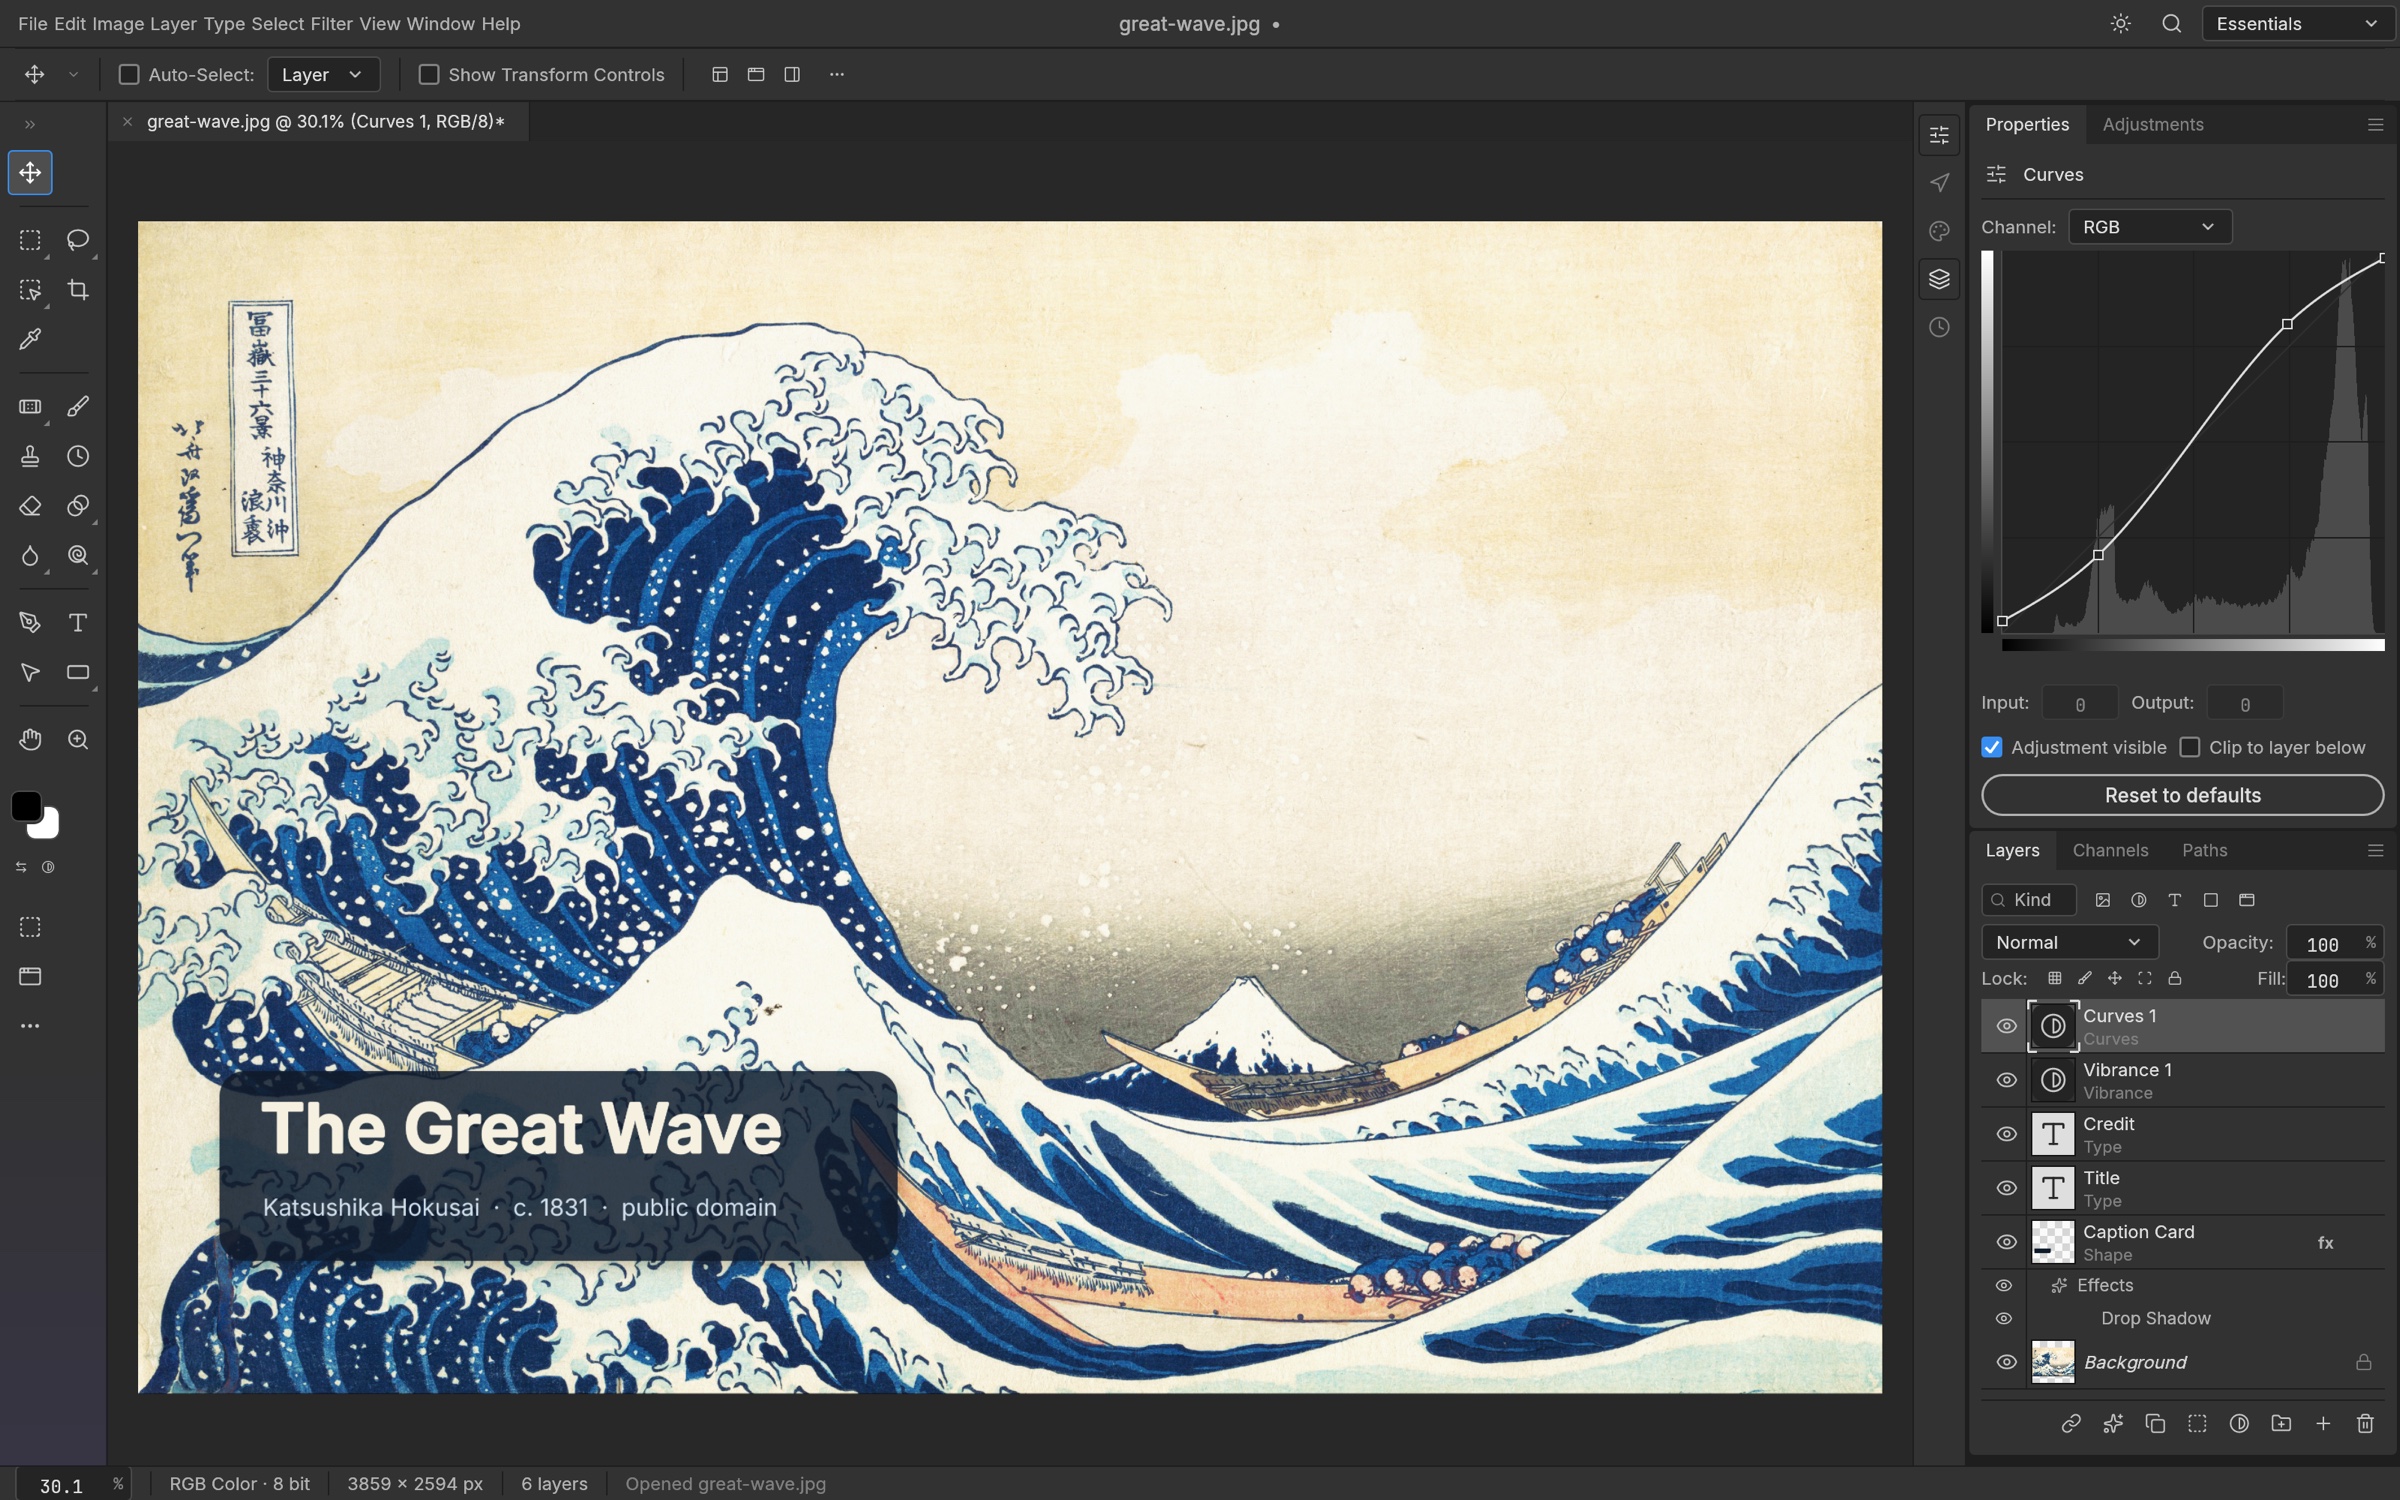
Let’s work towards one clear result: make a promotional image with a photo and a title. The aim is to keep something you can revise and something you can actually share, rather than learn every feature at once.
This walkthrough follows the developer’s public screens and menu descriptions. I have not run it myself, so the outputs below are expected results to verify, not a tested finished example. Keep the English menu names visible while following along; they also help when your installed version differs.
Before opening the project
Prepare: One JPG you took yourself, a short title and a target size of 1080×1080 pixels. Include a Korean title if Korean text is part of your real work.
Check the official app page and release downloads for a build matching your operating system and CPU. If there is no suitable installer or the app does not start, read Get started/Quick start and known issues in the official README. Record the app version and OS when you try the task.
Use copies for the exercise and keep originals, working documents and exports in distinguishable folders. The documented stage is early alpha. Check the article’s source date against your installed version if a menu or supported format has changed.
Find the relevant controls
| Where to look | What it does |
|---|---|
| Layers | Keep the photo and title independently selectable. |
| Type and character settings | Choose the font, size and colour of the title. |
| Export As | Separate the working document from the shared image. |
Example settings
| Setting | Example |
|---|---|
| Canvas/output | 1080×1080 px |
| Example title | My AI Workshop; optionally test Korean text too |
| Shareable output | PNG at the intended pixel size |
| Editable copy | PSD with a new filename |
Follow the task
1. Open the photo
Use File → Open…, Ctrl+O on Windows or Cmd+O on macOS to open your JPG. Check which photo layer is selected before editing. Keep the original in its own folder.
2. Choose a square crop
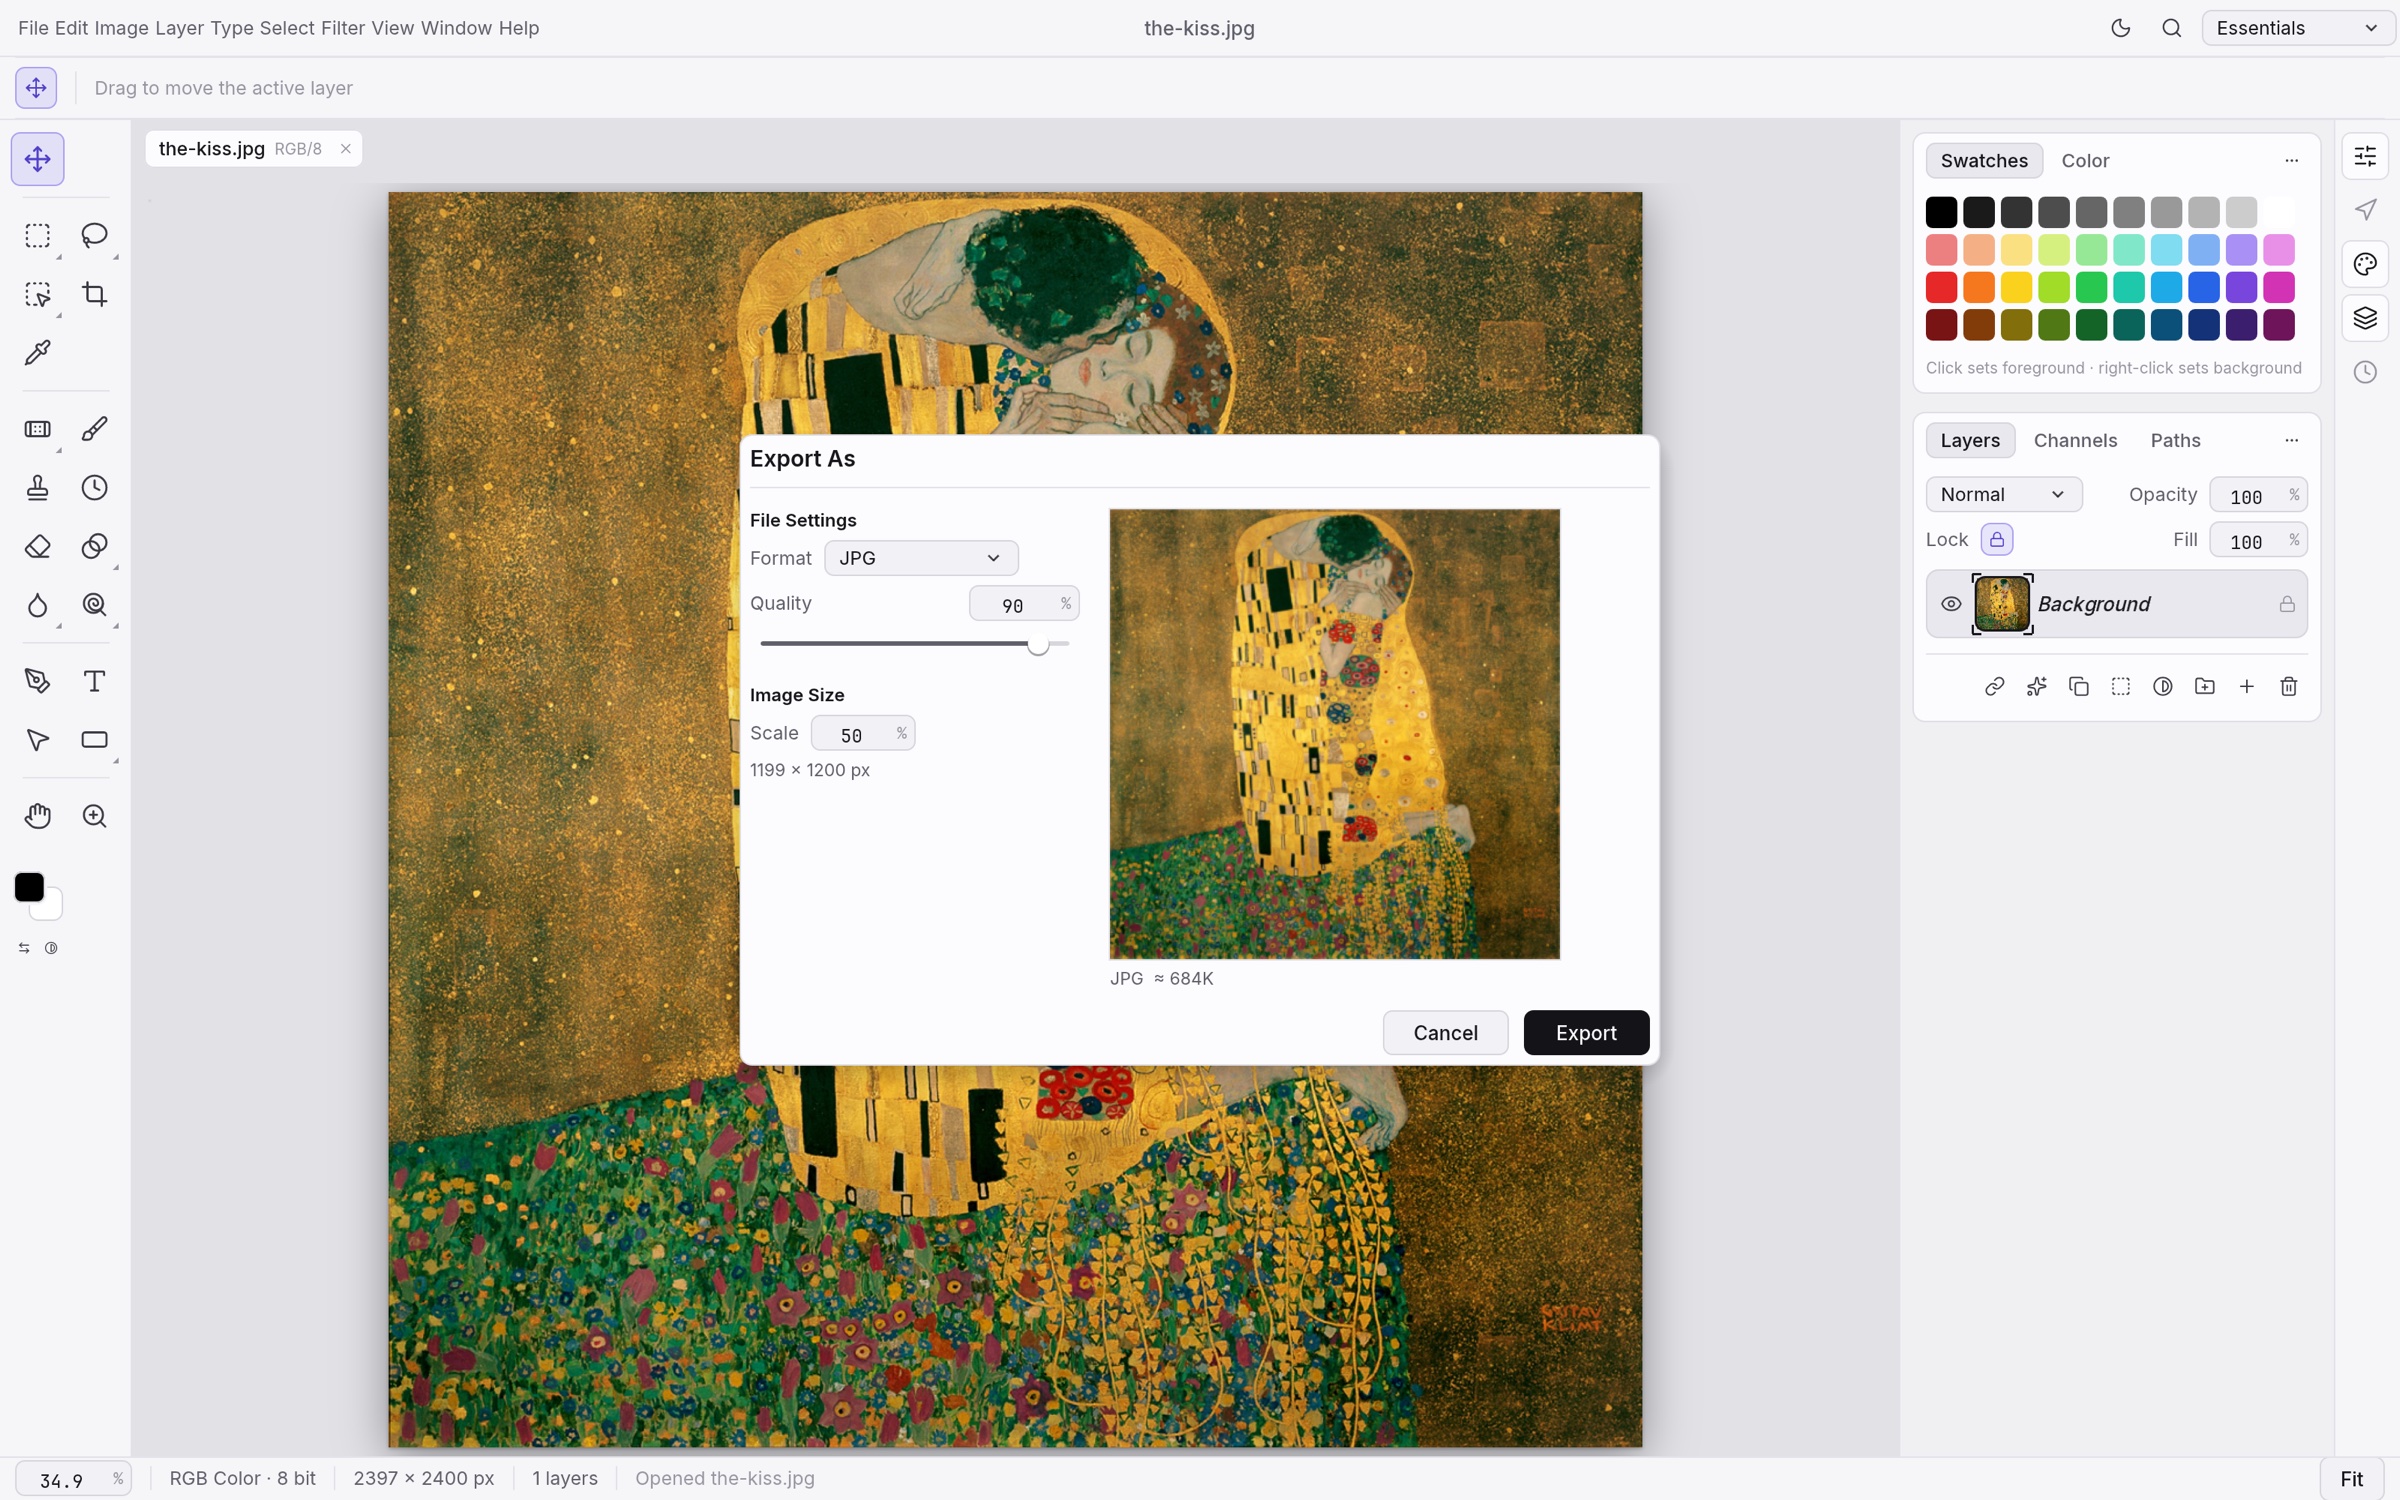
Use Crop to arrange a square composition. Move the crop so the face or main object stays inside it. The final 1080×1080 dimensions are checked again when exporting.
3. Add a separate title layer
Use Type to enter the title above the photo layer. Choose a readable font and enough contrast. Check the title at a small viewing size, rather than relying on how it looks when zoomed in.
4. Adjust brightness and colour
Use Levels or Curves in an adjustment layer. Toggle the adjustment to compare it with the original. Reduce an overly strong correction, and use a mask if only one part should change.
5. Save the editable document
Use File → Save As… to create a new PSD. Close and reopen it, then change the title. The photo and text should still be separate layers; a flattened preview alone is not enough.
6. Export the PNG
Use File → Export → Export As… and check PNG plus 1080×1080 output. Quick Export as PNG is another documented route. Open the saved PNG in another viewer and inspect text, colour and margins.
Expected output and the next small revision
The PSD is for the next edit; the PNG is for sharing. Keep both without overwriting the original photo. Reopen the PSD and change one word while leaving the photo intact. Toggle the adjustment layer and inspect masks and fonts as well as the layer list. In the PNG, check the actual pixel dimensions, square crop and readability of Korean characters if you used them.
A small layered thumbnail is a useful first exercise. It does not settle whether generative filling, existing plug-ins or a complex PSD delivery workflow will work. If those are the main reason you use Photoshop, test those requirements explicitly before changing your normal process.
If you get stuck
If the title uses a different font after export, check the installed font separately from the image dimensions. If the edges are cropped, inspect the canvas and export size. Change one setting at a time so you can identify the cause. On Linux Wayland, if drag-and-drop fails, the README points to File → Open as the alternative route.
Keep the last working copy separate from the problem file. Record the exact error and the step where it appeared. Changing several settings at once makes the cause harder to find. If you replace an input file, note that it is a different test rather than declaring the original successful.
Check before scaling up
- Save and reopen the same masks, adjustments, fonts and effects in both apps.
- Compare edges, Korean lettering and colour in equal-size PNGs.
- Repeat the same title and size changes, recording manual corrections.
For repeated title changes, first prepare a document in which the photo and text can be selected independently. Specify the wording, position and output size separately. Check one image before extending the operation to a batch; automation cannot check that you chose the right original photo on your behalf.
Introduction · Task tutorial · Comparison: documented differences
Sources & further reading
- https://getartcraft.com/apps/photocraft
- https://github.com/storytold/photocraft/blob/main/README.md
- https://www.adobe.com/products/photoshop.html
- https://github.com/storytold/photocraft/blob/ed7df56a2455375240959bae6e5273a71d858d84/README.md
- https://github.com/storytold/photocraft/blob/ed7df56a2455375240959bae6e5273a71d858d84/crates/ui-egui/src/menus.rs