Make for beginners: read your content ideas from Google Sheets
Follow seven official example screenshots to create a Make scenario, connect Google Sheets, configure Watch New Rows and inspect your first output.
Last updated
Menus and supported features can change. Compare the source-check date below with your current app version.
If you keep video or blog ideas in a spreadsheet, start your first Make scenario by reading those rows and checking that their titles and notes arrive correctly. The finished result in this guide is your own sample idea visible in Make’s output inspector. It gives you a verified input to connect to another task later.
All seven images below are examples supplied by Make’s official Help Center, not screenshots of our own logged-in test. We checked the documentation on October 26, 2026. Its Prospects file, names and contact details belong to the official example; our exercise uses a personal Content Ideas sheet instead. Click an image to enlarge it or its caption link to read the source. The plan numbers and dates shown in those older images are not a promise about your account.
1. Prepare a small practice sheet
You need a Make account and a Google account. New users can sign up for Make · affiliate link. This exercise does not need Slack or an AI API key. Open Make sign-in. Use your existing account, or follow Sign up and finish registration before returning to the dashboard.
In Google Sheets, create a spreadsheet named Content Ideas. Use these cells:
| Cell | Value |
|---|---|
| A1 | Title |
| B1 | Notes |
| A2 | Make a short video from a mug photo |
| B2 | A slow camera approach |
This two-column dataset is our practice example. You do not need to recreate the contact columns in Make’s screenshots. Keep the sheet open so you can compare its contents with the returned result. Also note the tab name at the bottom: the file name Content Ideas and the tab name Sheet1 are different settings. A localized Google account may use a different default tab name.
A separate practice file makes the comparison straightforward. You know exactly which title should come back, and there is no need to sort through a production sheet while learning the controls.
2. Create the scenario and select the reading action
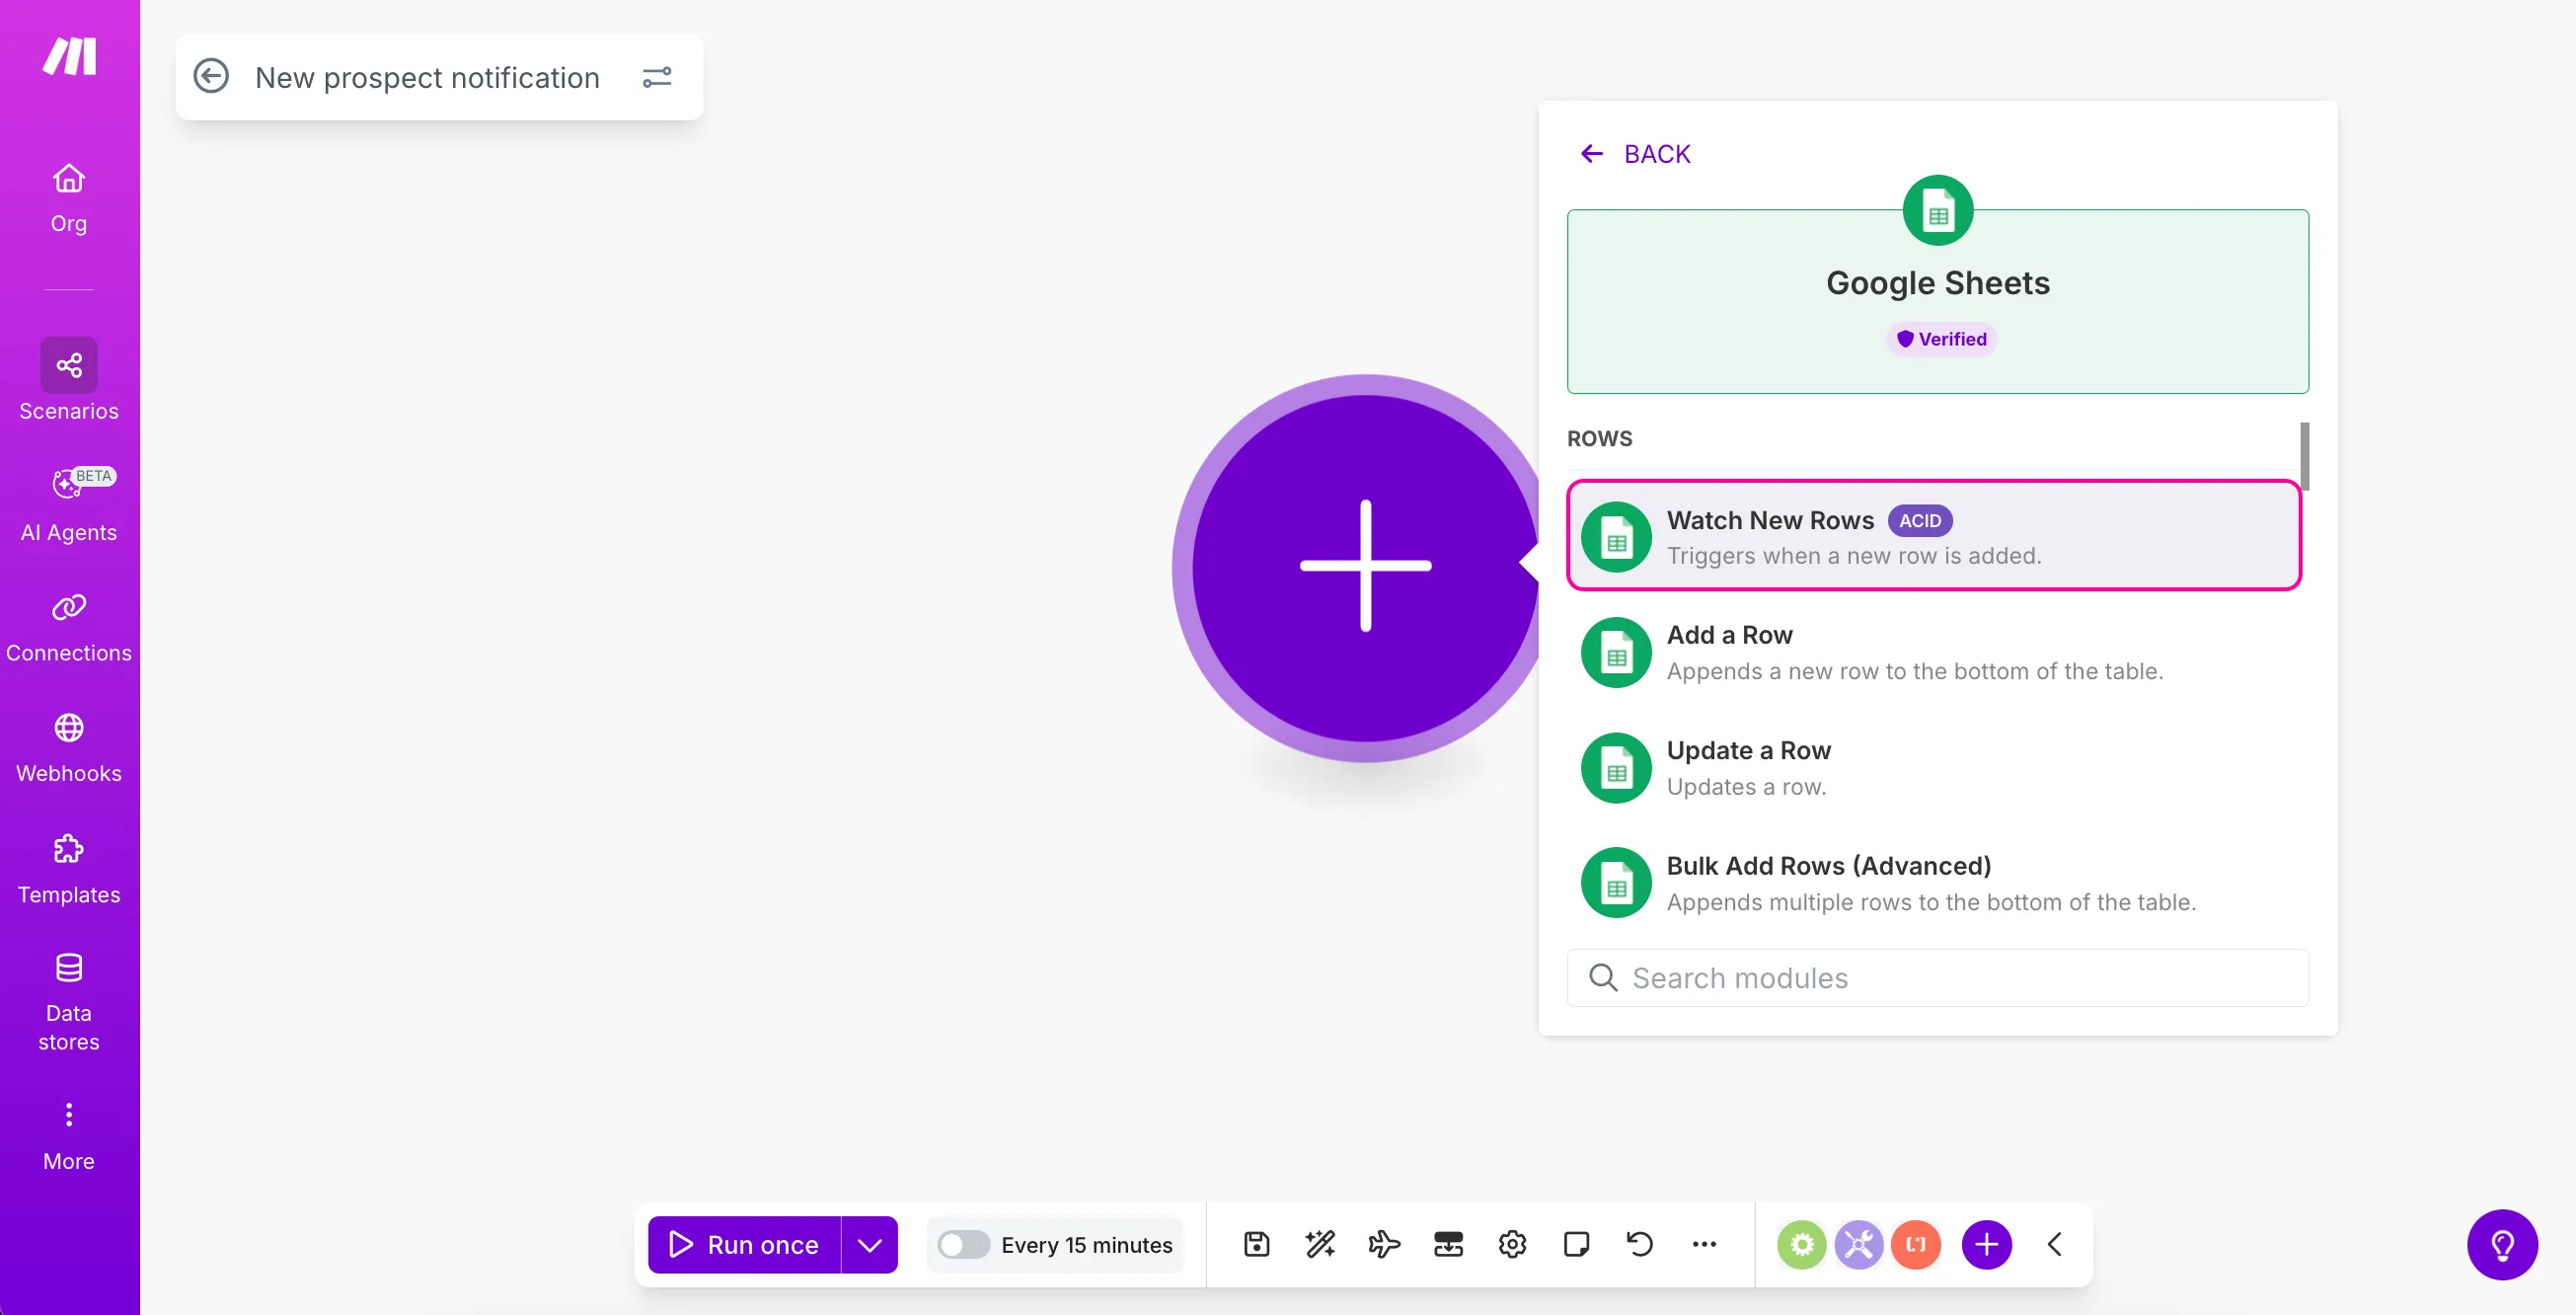
From the dashboard, choose Create scenario at the upper right; the help text also calls it + Create a new scenario. The Scenarios section offers another entry point. In the editor, rename New scenario to Read Content Ideas, then use the toolbar’s save icon.
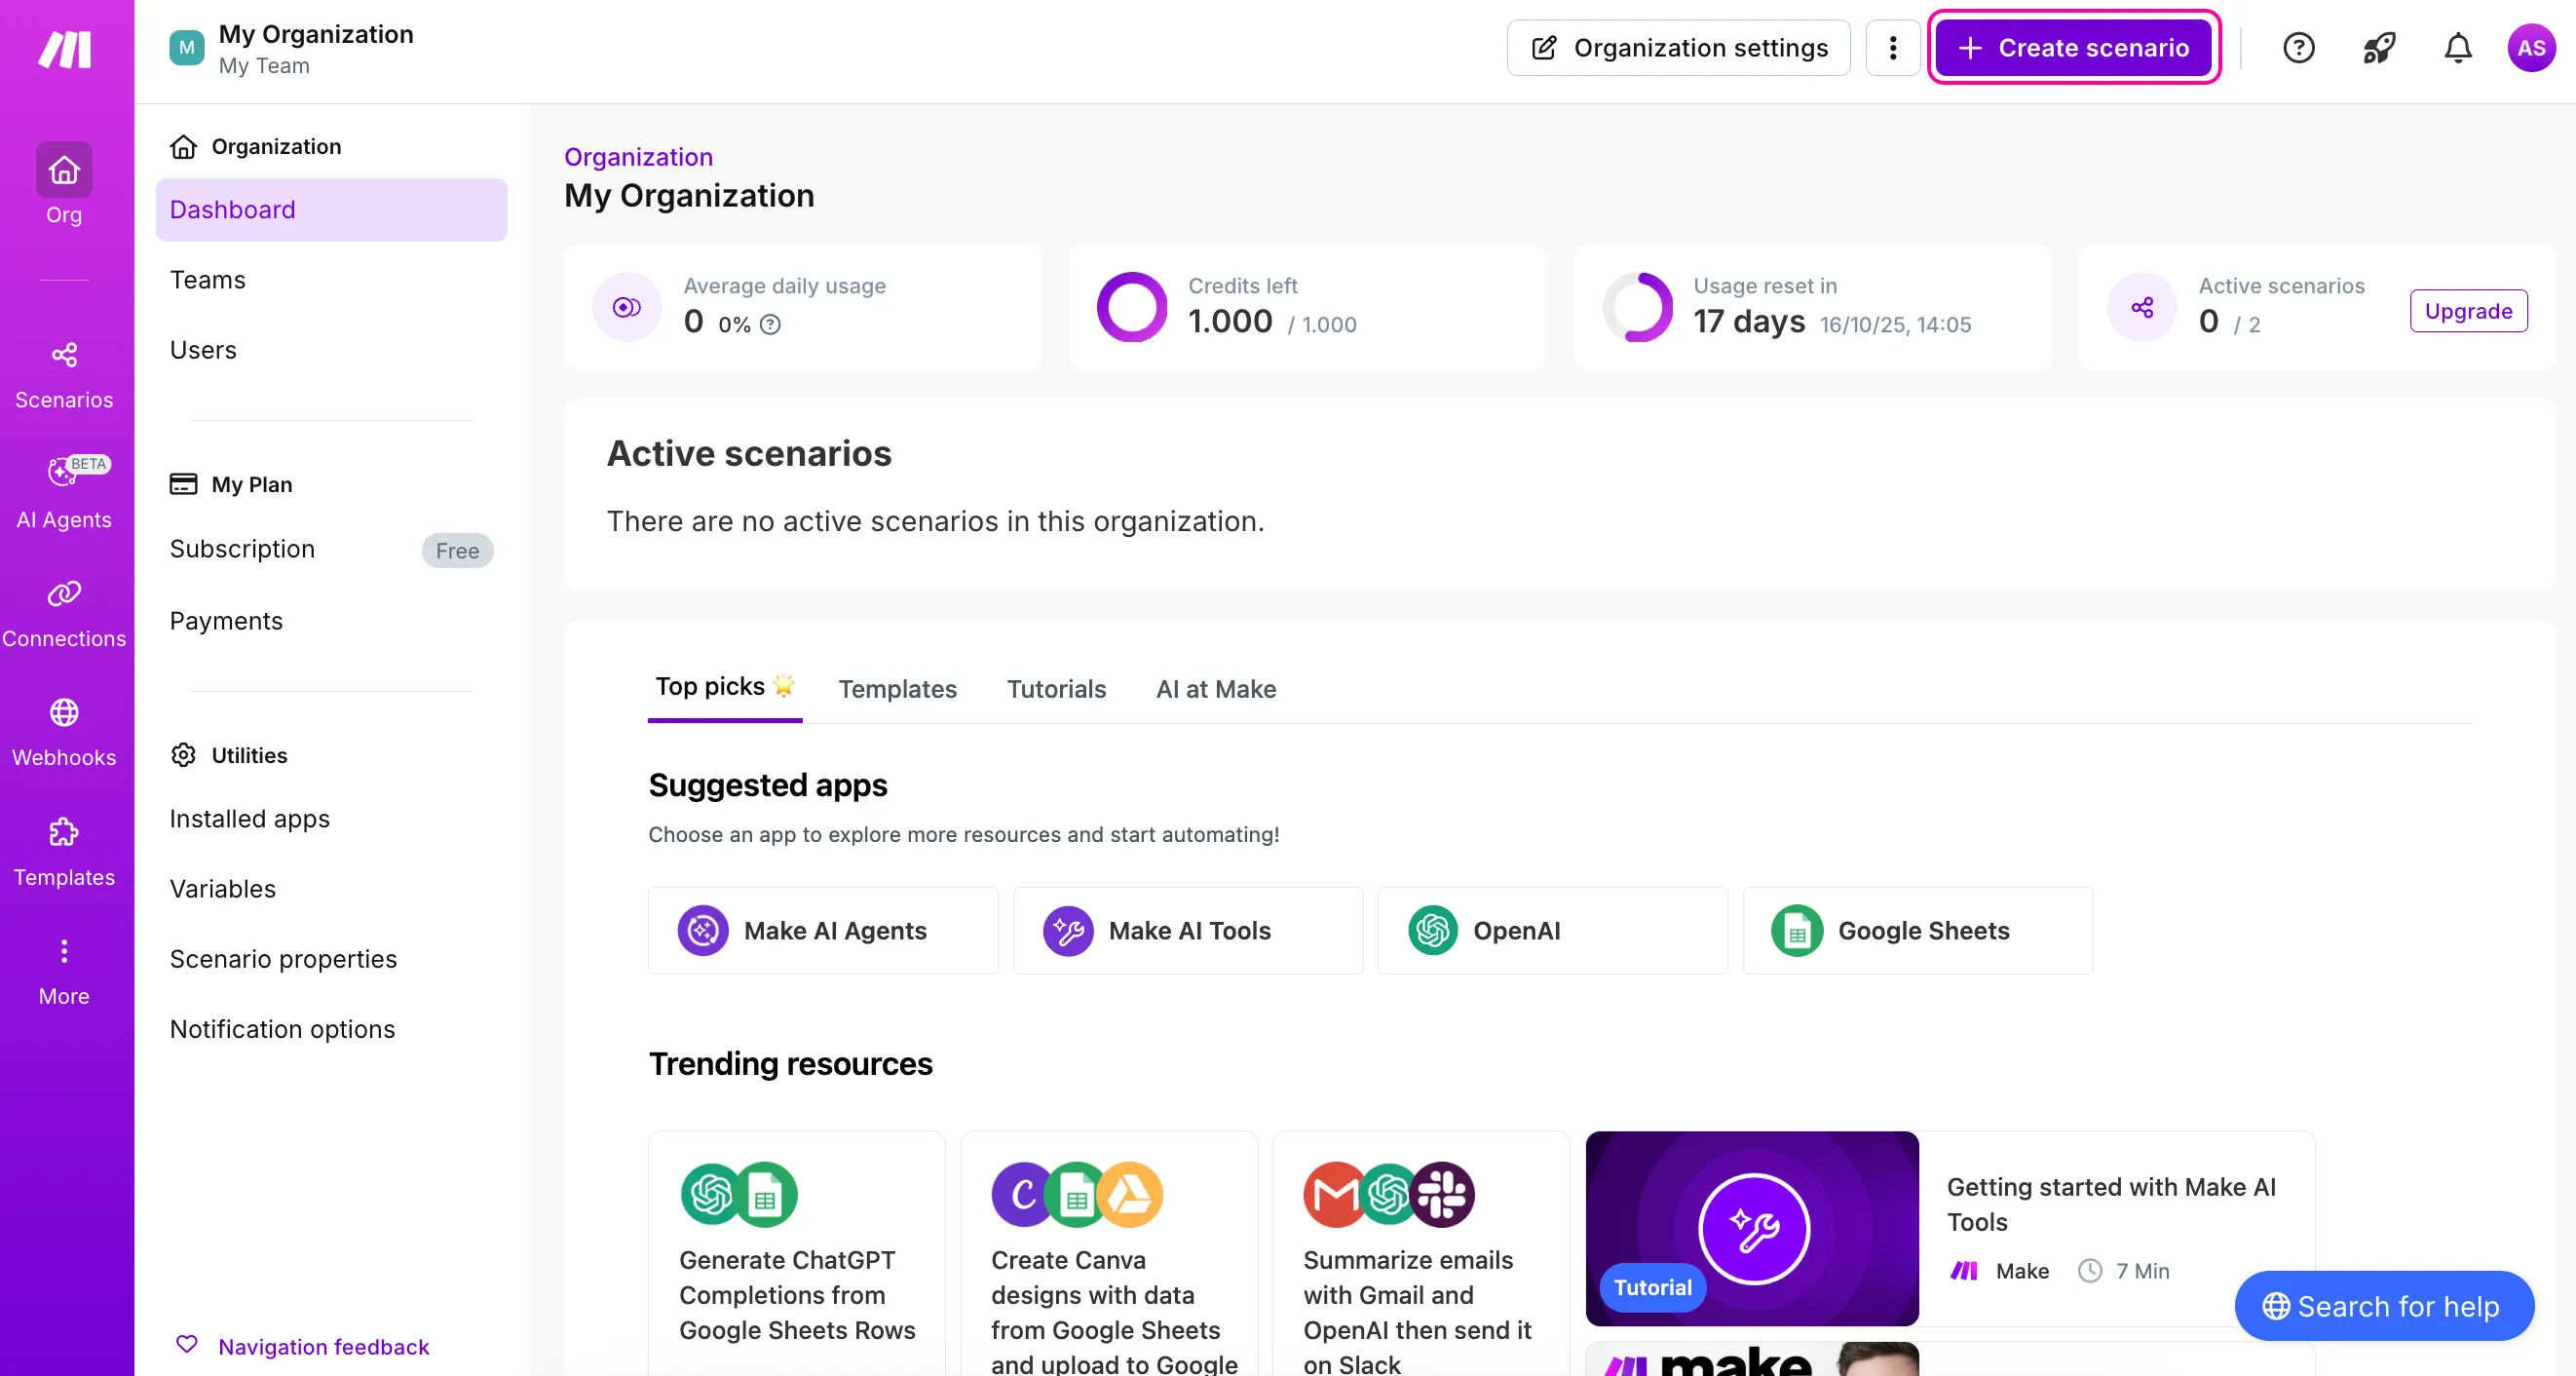
Click the large central +, search for Google Sheets, select that app and choose Watch New Rows. The green circle should now carry that action name. Add a Row writes data instead, so it is not the action for this exercise.
3. Connect the Google account that owns the file
Choose Create a connection, enter a recognizable connection name and select Sign in with Google. Pick the Google account containing Content Ideas. Review the access request and complete Google’s authorization flow. On return, the new connection should be selected in Connection.
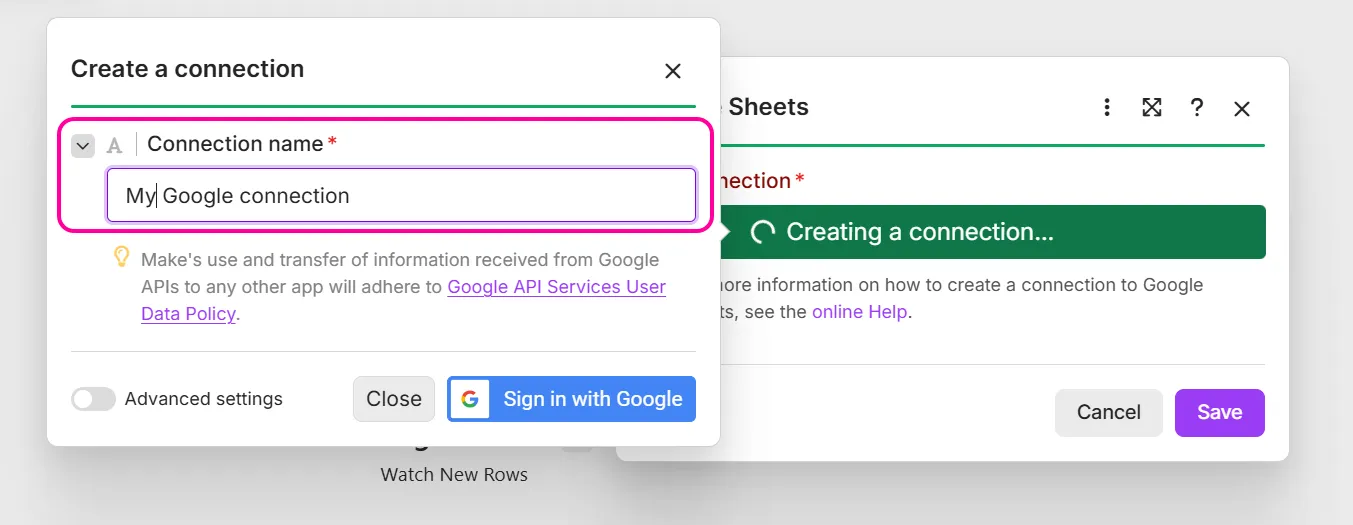
Do not assume your Make login identifies the Google account holding the sheet. If the file is missing from the picker, first check which Google account you connected. If authorization is denied or a managed-account restriction appears, read that explanation before trying the same action repeatedly.
4. Choose the file and reading settings
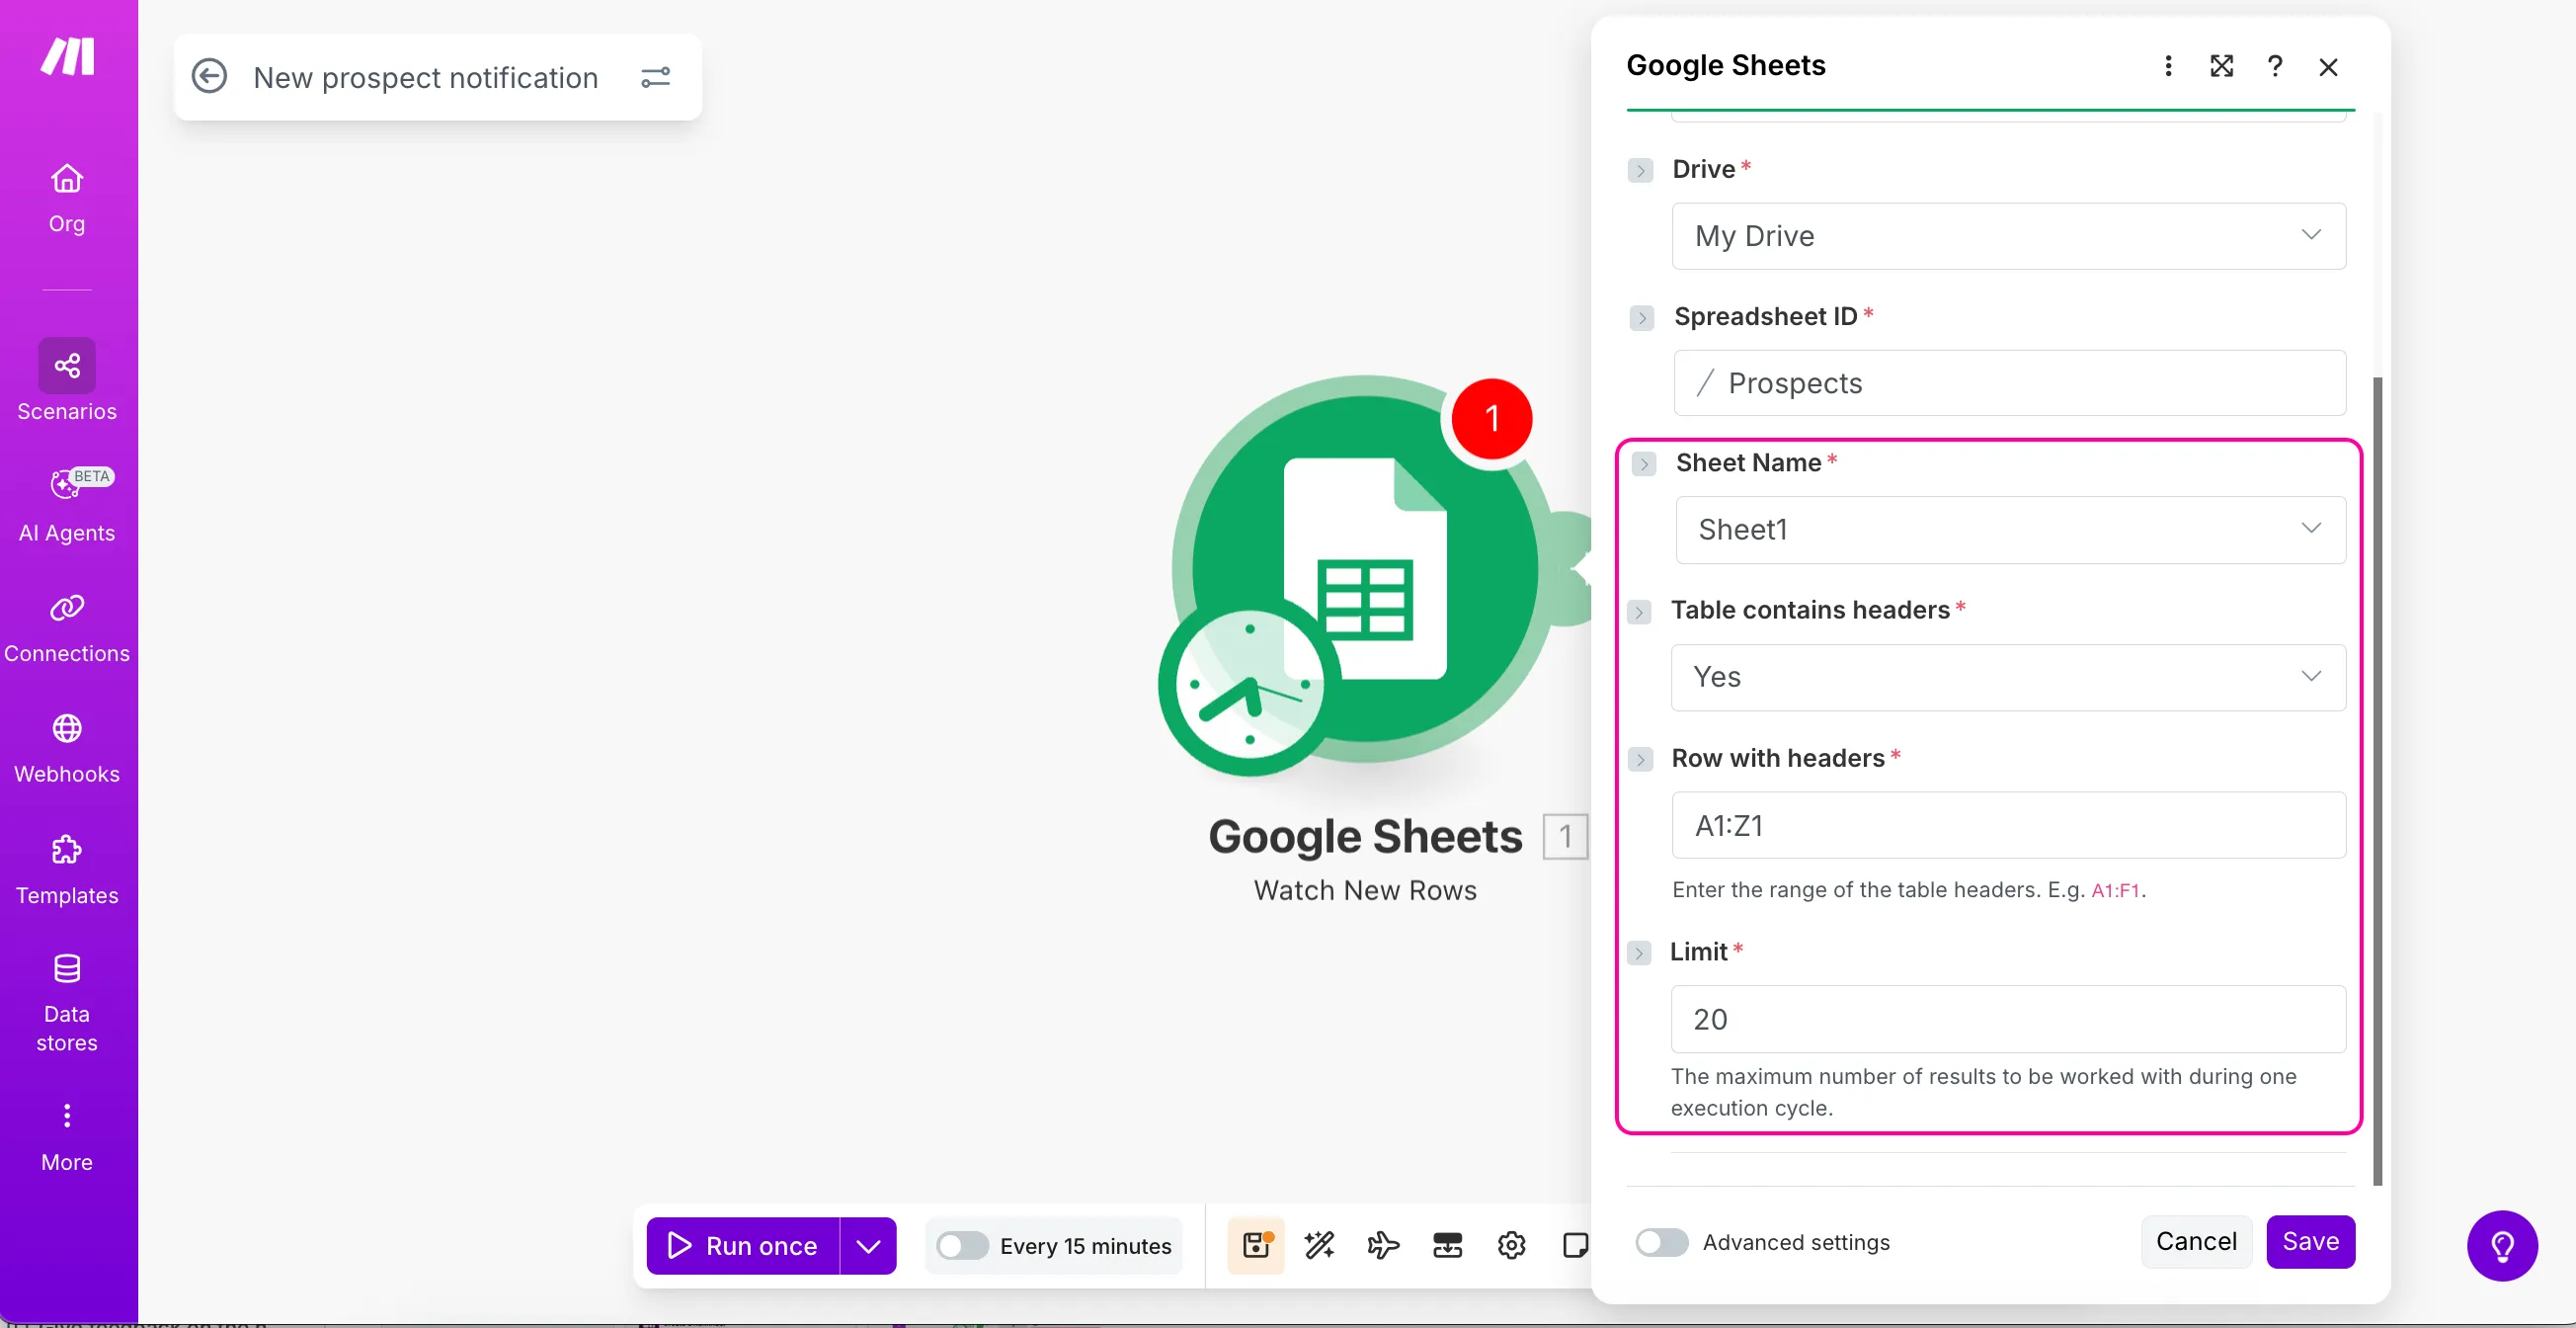
Keep Search Method: Search by path, choose the appropriate Drive, then use Spreadsheet ID → Click here to choose file to select Content Ideas. Select the actual tab under Sheet Name. Set Table contains headers: Yes, Row with headers: A1:Z1, and Limit: 20. Click Save, then save the whole scenario with the toolbar icon too.
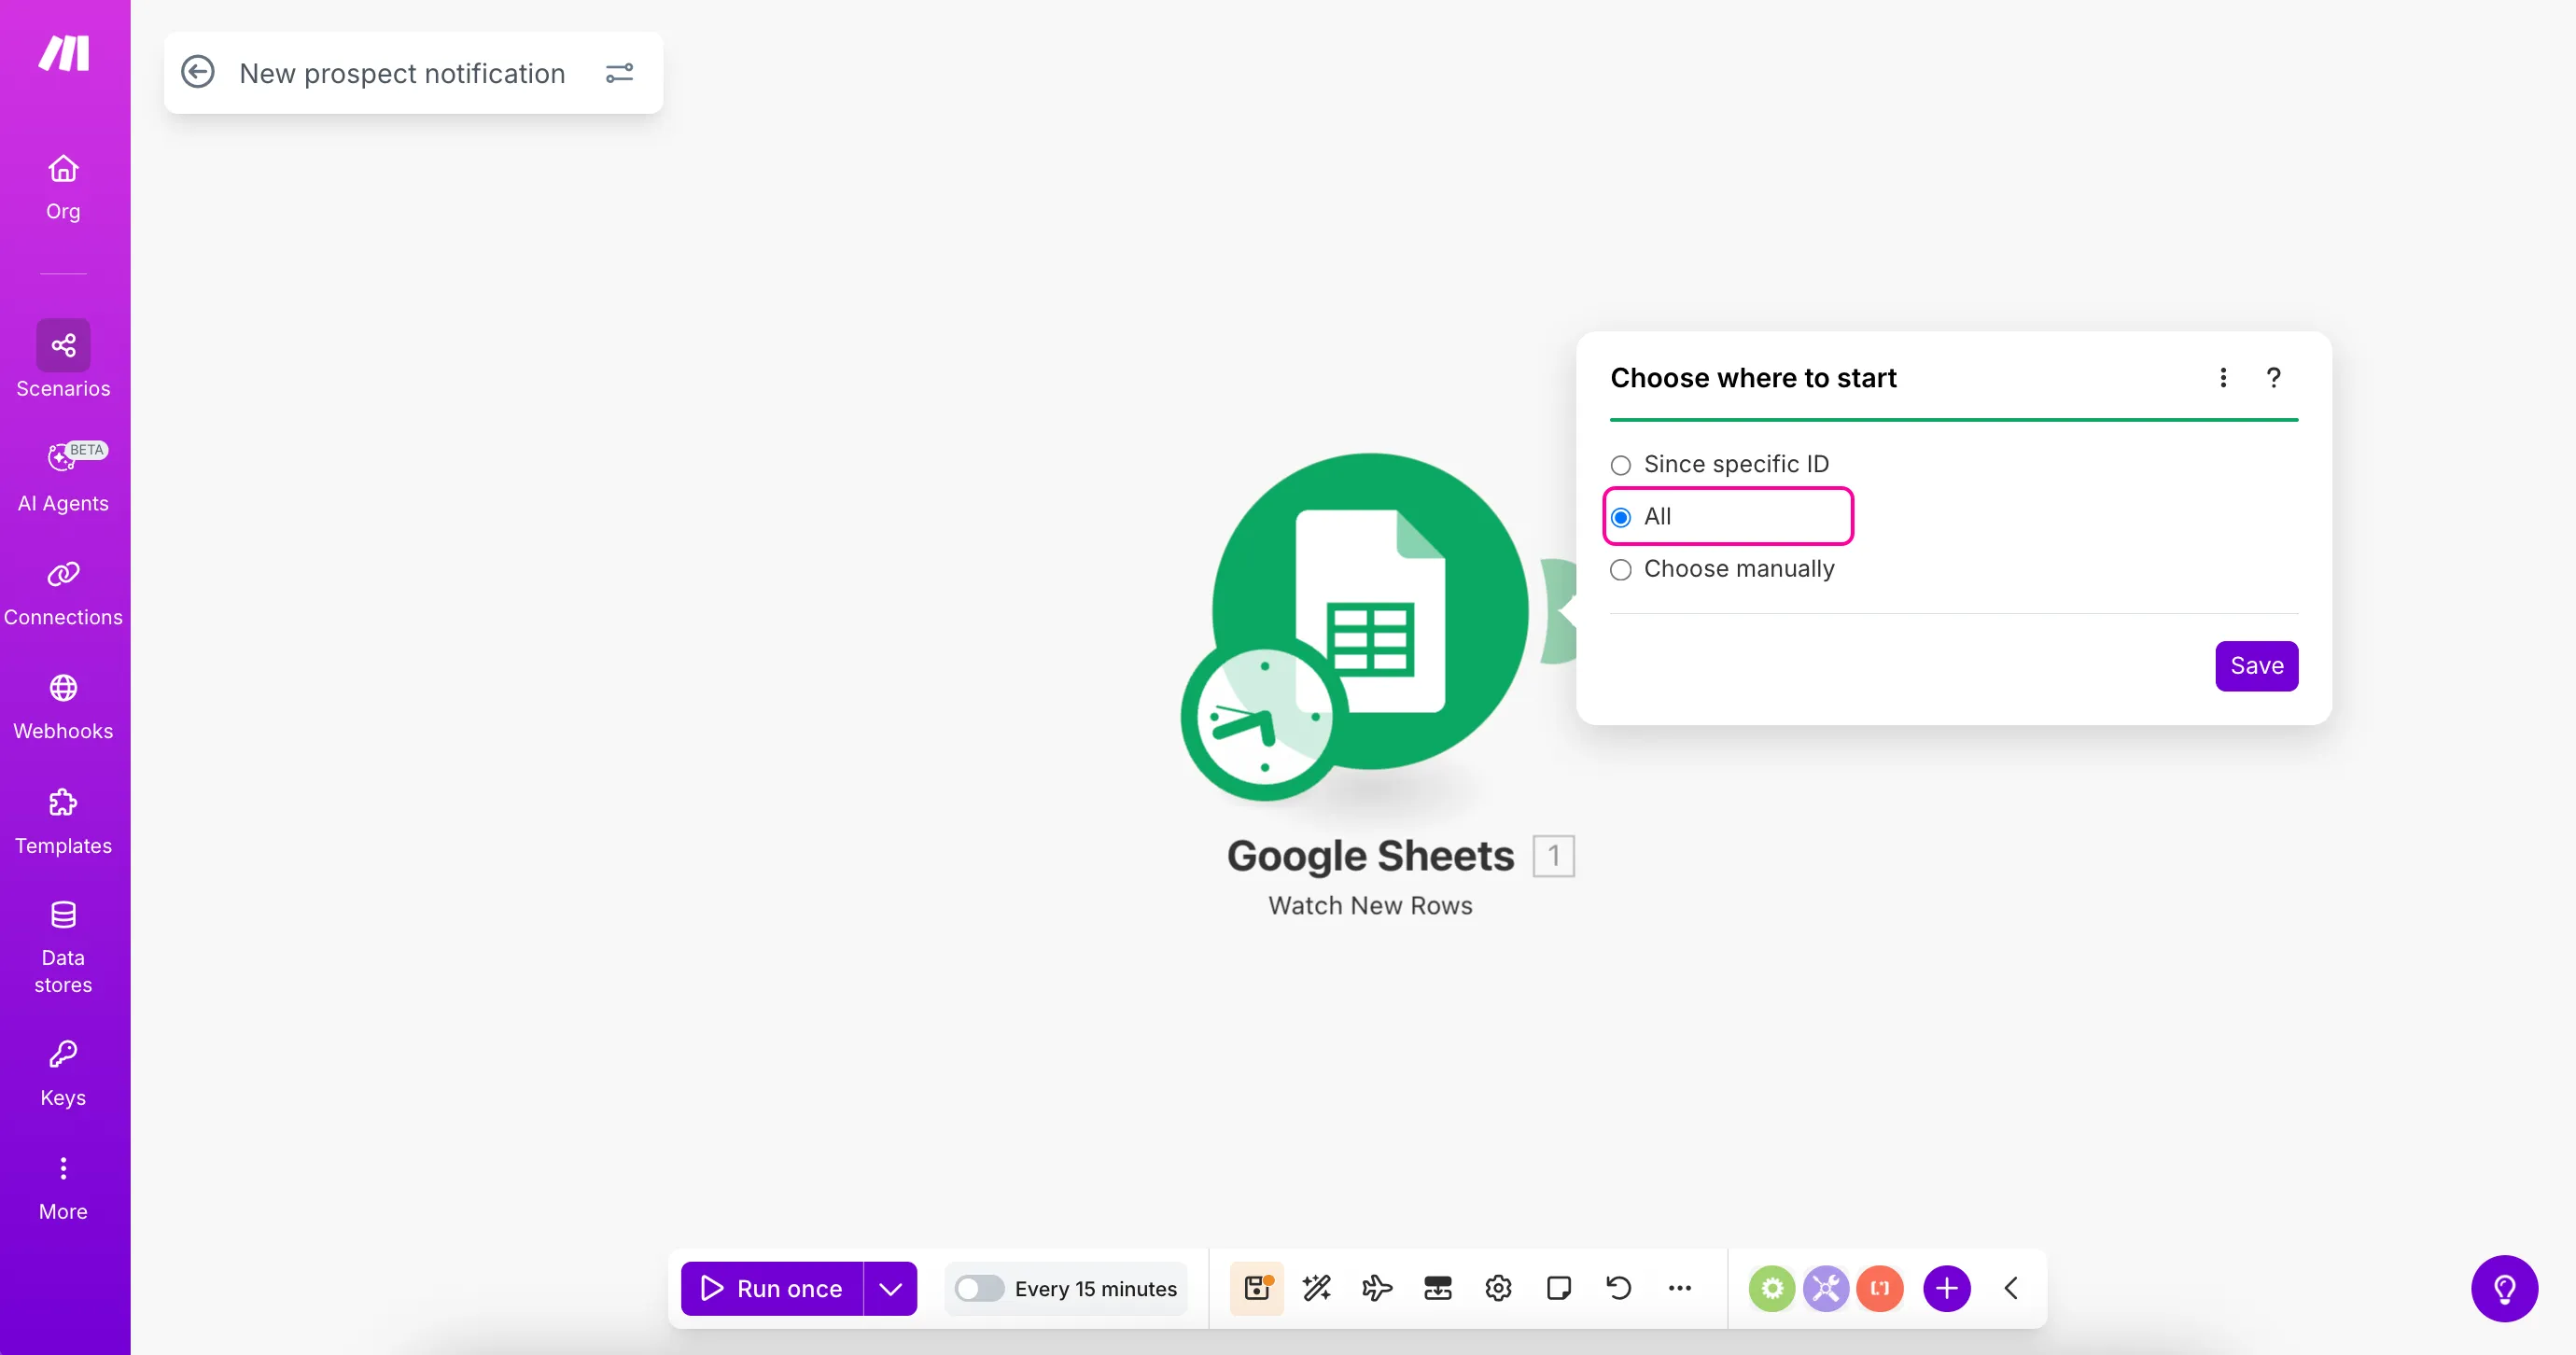
In Choose where to start, select All → Save for this small practice file so the existing sample is included. If you closed the dialog, right-click the module and reopen Choose where to start. All includes existing rows, so reconsider the starting point before applying it to a large real-world file.
5. Test the module and compare the returned values
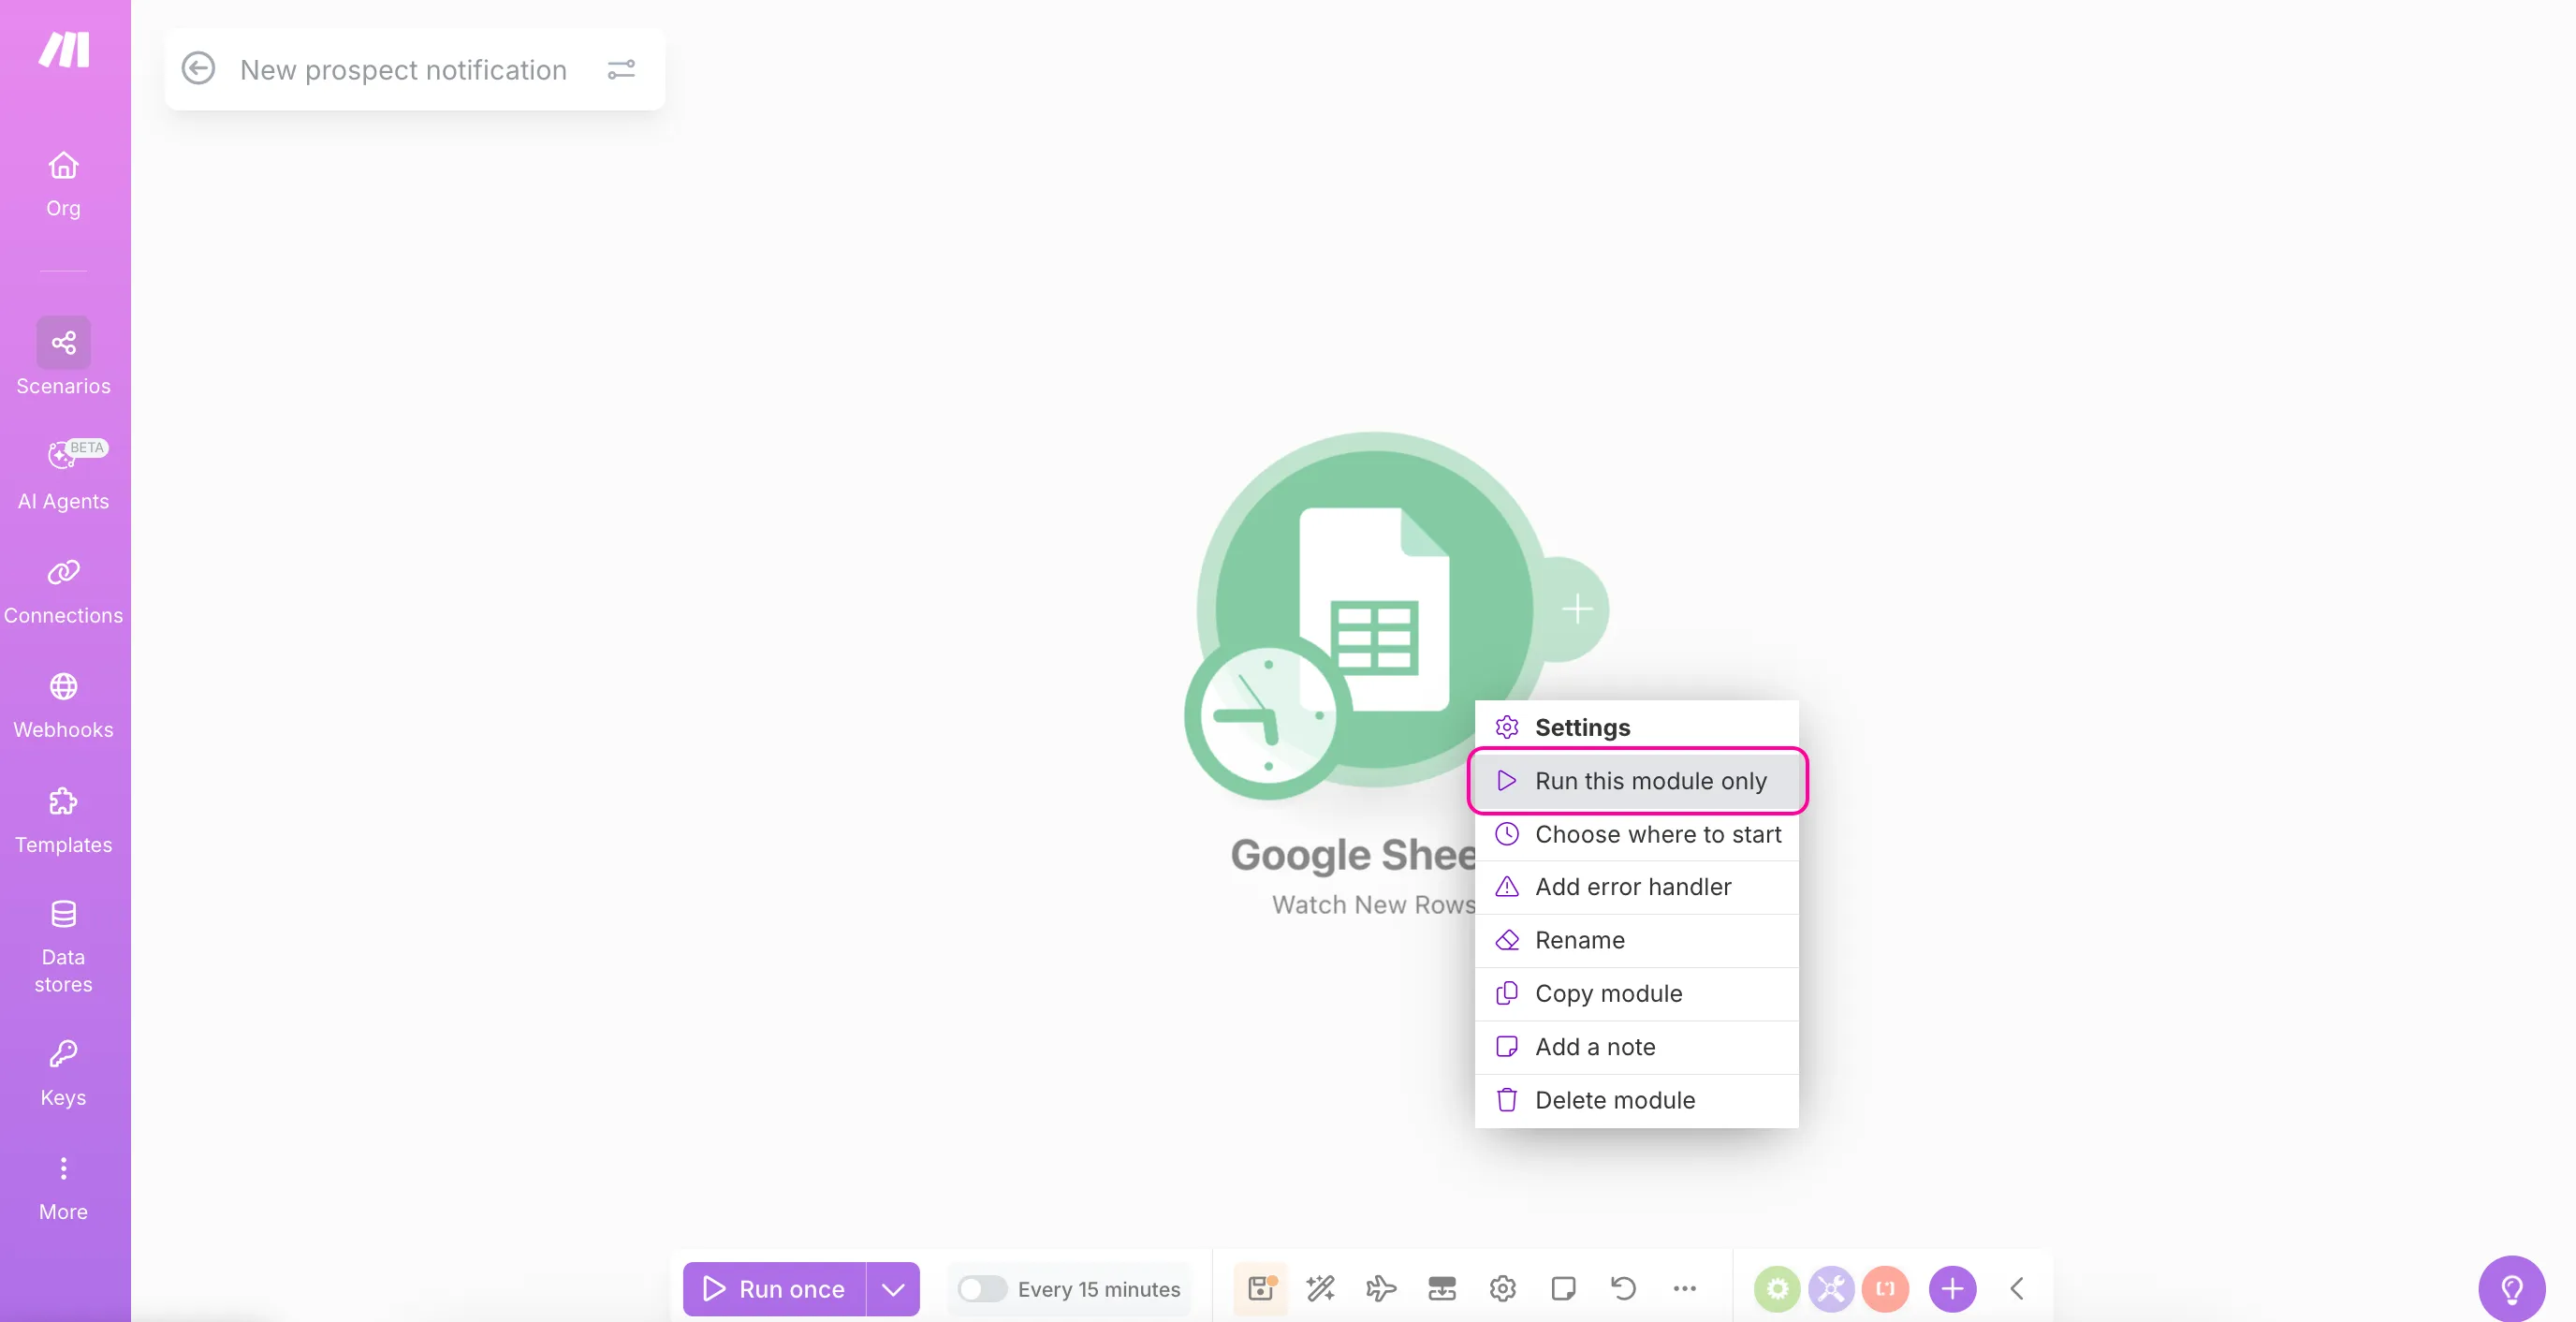
Right-click the Google Sheets circle and choose Run this module only. The documentation shortens this to Run this module, while its screenshot includes “only.” After completion, open the small output bubble above the circle and inspect OUTPUT.
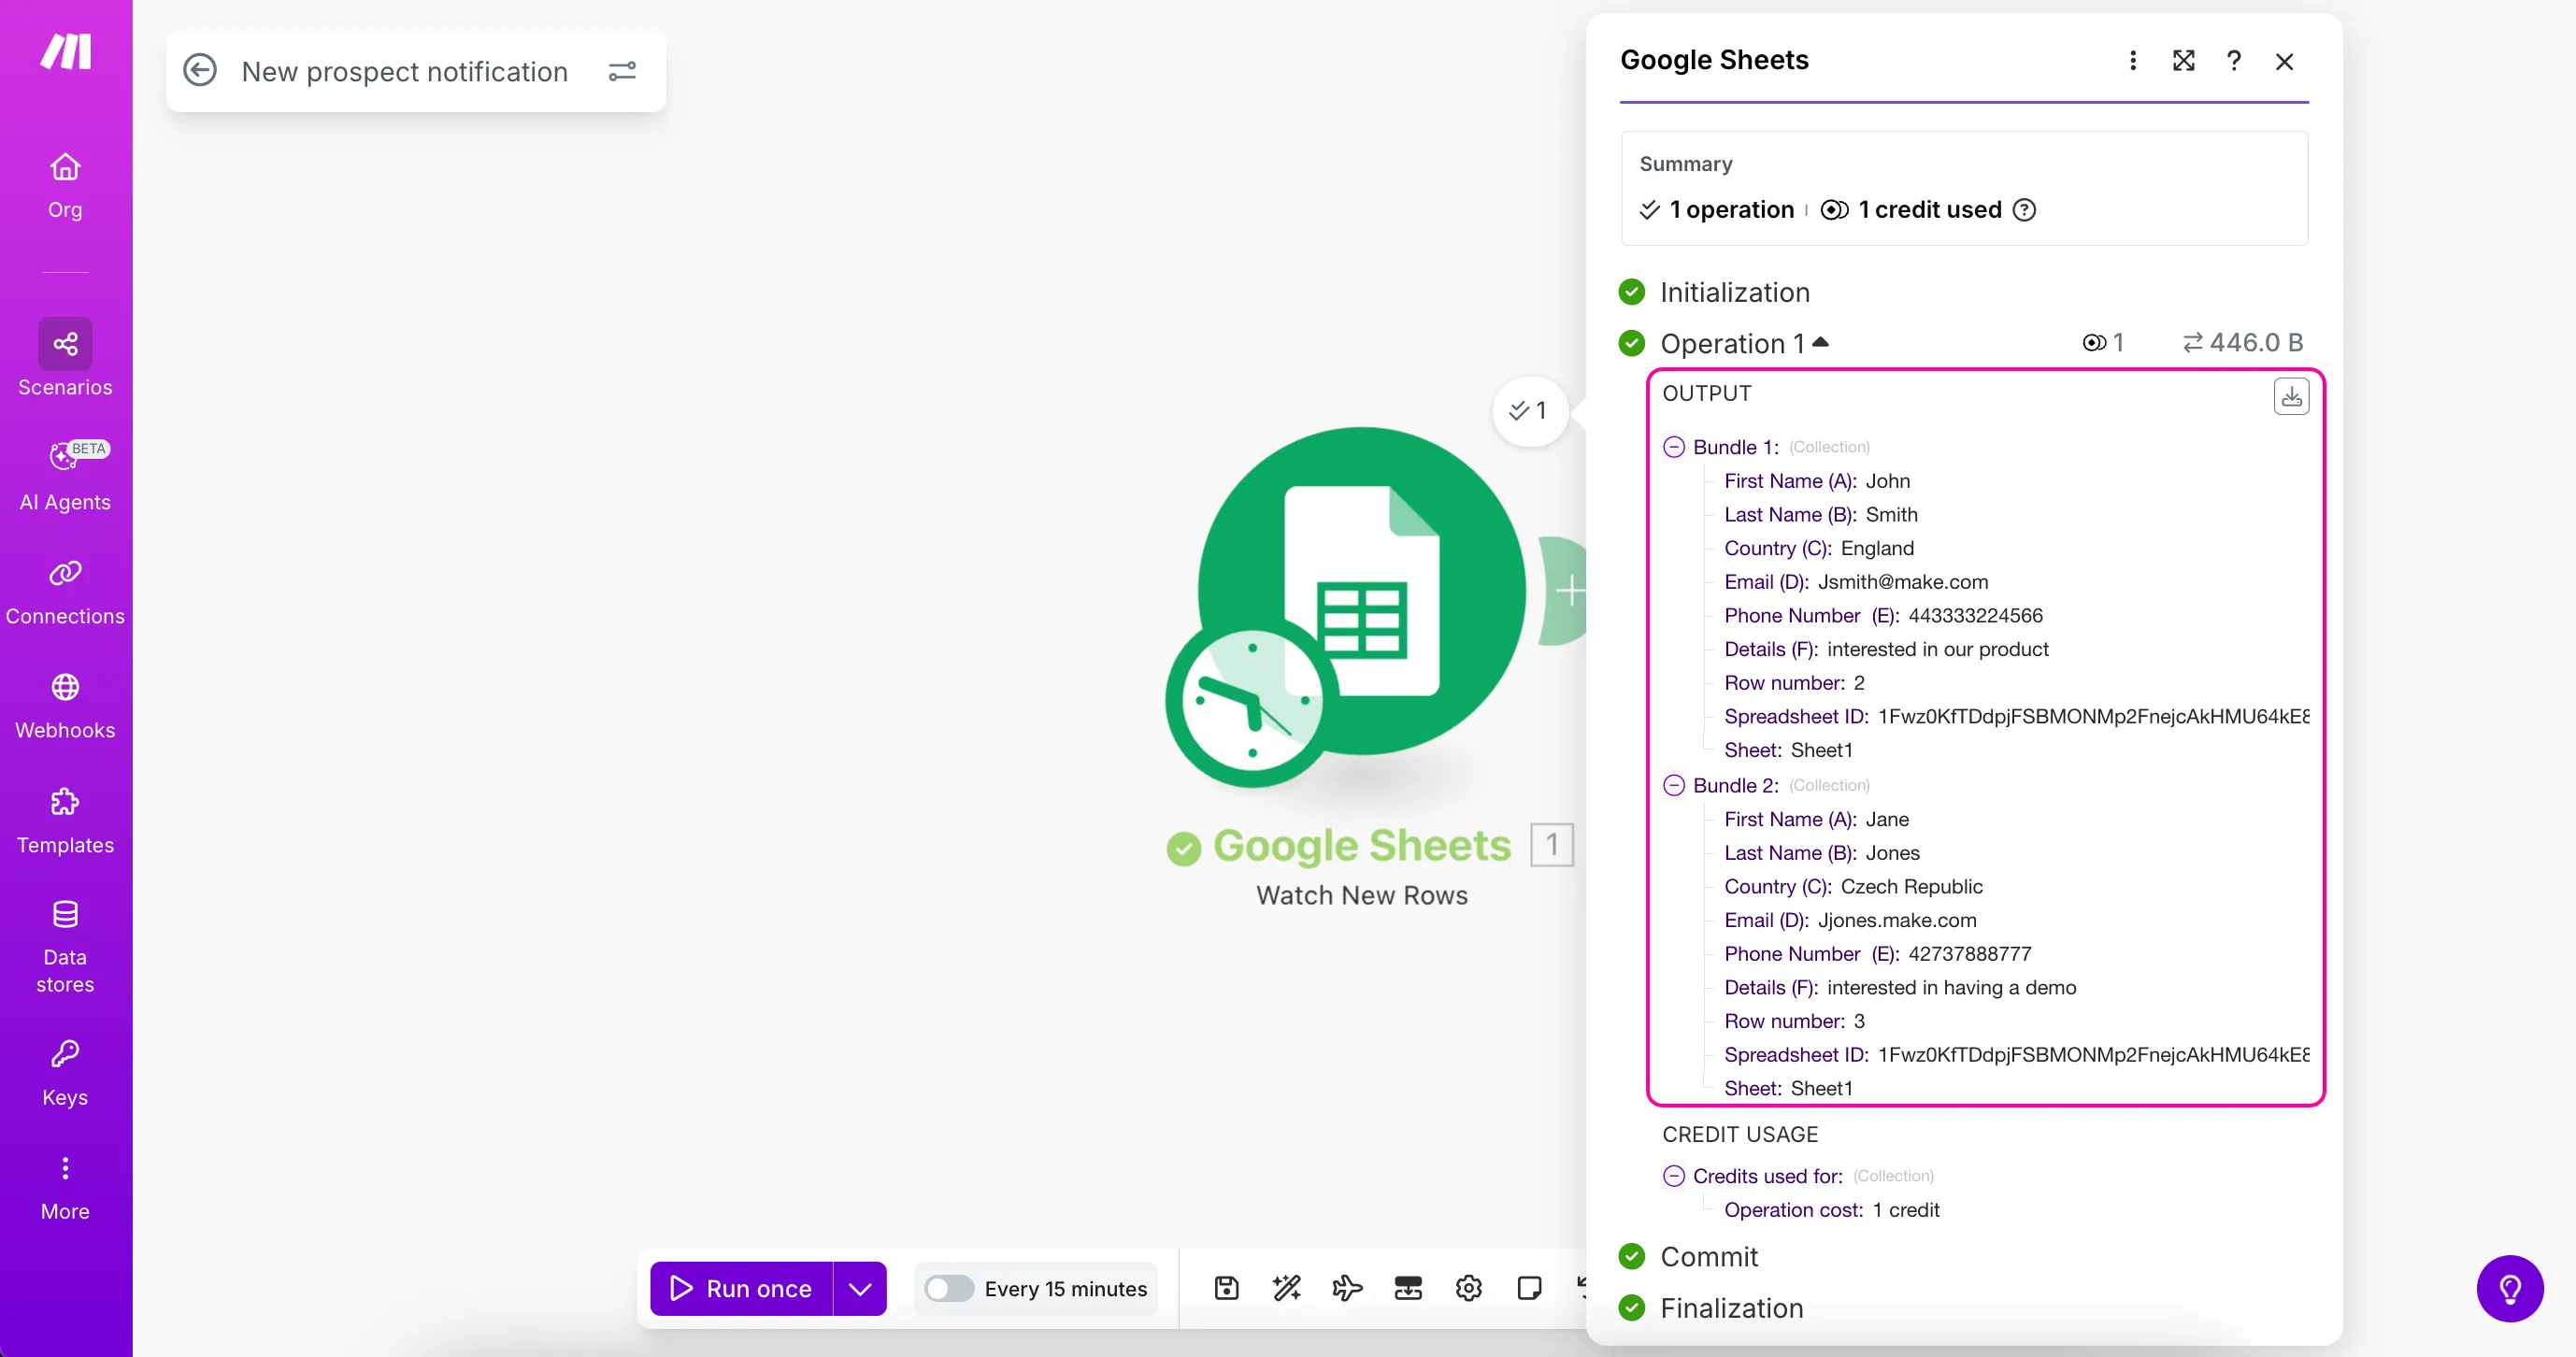
Compare Title with A2 and Notes with B2 rather than relying on a green success indicator alone. A different title suggests checking the selected file or tab. Unexpected field names suggest checking the header row. The module remembers processed rows, so another identical run may not return the same sample. After inspecting a successful result, add a second idea as a new row for a distinct next test.
Make’s documentation says this module’s test run consumes a credit. Inspect the input and settings before repeating a failed run. Stop after reading the output and save with scheduling switched off. At this point, the returned values have not been connected to another app or an automatic publishing action.
What you should have at the end
You should have a saved Read Content Ideas scenario, a Google Sheets connection and a visible output containing your sample title and note. This establishes where the data comes from before you attach a summarization or notification step. It is easier to correct the selected file now than to investigate an unexpected final message later.
For occasional personal planning, a spreadsheet alone may be enough. Add another step when repeatedly moving those same ideas elsewhere becomes useful. If you later need regular checks, read the official scheduling instructions and choose the interval alongside its credit cost.
Sources & further reading
- https://help.make.com/create-your-first-scenario
- https://help.make.com/step-2-get-your-apps-ready
- https://help.make.com/step-3-add-your-first-app
- https://help.make.com/step-4-create-a-connection
- https://help.make.com/step-5-set-up-the-trigger
- https://help.make.com/step-6-test-the-module
- https://help.make.com/step-10-schedule-your-scenario