Google Sheets AI canvas: publish a read-only event schedule
Create a fictional schedule, distinguish the canvas link from the source sheet, and check audience access, updates and stopping publication.
Last updated
Menus and supported features can change. Compare the source-check date below with your current app version.
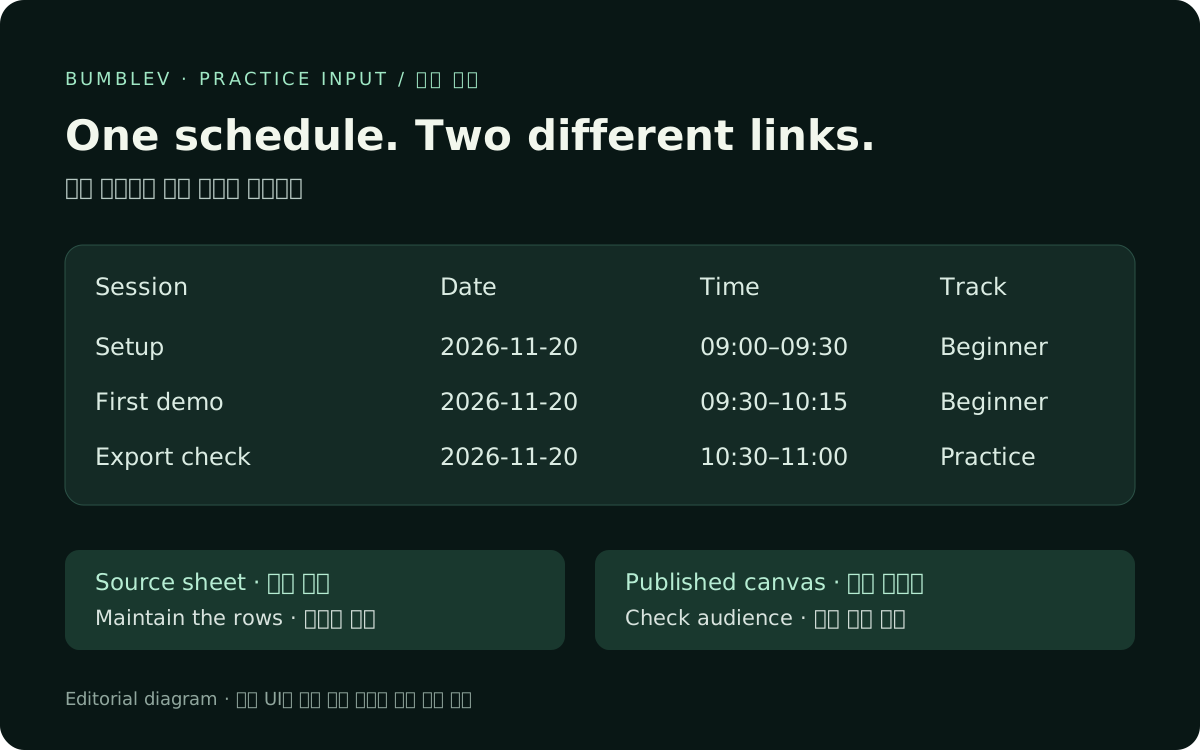
An event team may want to maintain a spreadsheet while giving attendees a simpler schedule to browse. This guide uses Google Sheets canvas to plan one filterable schedule and publish a read-only link separate from the source spreadsheet. The practice goal is one fictional schedule, not a new app we have built and tested.
This is a documentation-based guide checked on November 17, 2026. In our earlier Korean-language editor check, the canvas menu was absent. We did not complete generation, publication or recipient-access testing. The outcomes below are checks for the reader to perform. Google’s demonstrations are external examples, not our execution results.
1. Check the account and web environment
On a computer, sign in to Google Sheets and create a spreadsheet. No separate desktop installation is assumed. Use a normal Google Sheets file stored in Google Drive. For an Excel file, the official conversion path is File → Save as Google Sheets.
The current help page specifies English and an eligible Google Workspace or Google AI plan. Limited personal-account access does not establish the same entitlement as a paid plan. Standalone publishing also has its own rollout: the announcement starts Rapid Release rollout on November 11 and Scheduled Release on December 2. Work and school policies can affect access. Check eligibility before buying a plan to solve a missing-menu problem.
2. Prepare three rows without private data
Name the file Workshop schedule practice and its first tab Schedule. Paste the following into A1. These are fictional sessions; do not substitute private meetings, attendee details or email addresses.
Session	Date	Start	End	Track
Setup	2026-11-20	09:00	09:30	Beginner
First demo	2026-11-20	09:30	10:15	Beginner
Export check	2026-11-20	10:30	11:00	Practice
Before generating anything, check the five columns and three sessions. First demo lasts 45 minutes, and there is a 15-minute gap before Export check. Those details give you concrete errors to look for: the generated view must not fill the gap with an invented session or silently change a time. Keeping date and time in separate columns also makes a cell-by-cell comparison easier.
A canvas uses data from one sheet tab. This exercise therefore does not assume a combined view of several tabs. If your real data is scattered across a workbook, prepare a small separate tab containing only the information you intend to share.
3. Create the canvas and compare values first
The documented menu path is Insert → Create a canvas. Other documented entry points are Tools → Create canvas in the side panel and Canvas menu → Create a canvas in the bottom bar. Use the path actually available in your account, then enter:
Create a read-only event schedule from the Schedule tab.
Show Session, Date, Start, End and Track.
Add a Track filter with an All option.
Preserve every supplied value and the gap between sessions.
Do not invent speakers, locations, people or additional sessions.
The expected result is a view with three sessions and a track filter. Before requesting visual changes, check that All shows three rows, Beginner shows two and Practice shows one. Compare every date and start/end time against the source. If a filter is missing or a value changes, request a correction and repeat the comparison. A generated interface is not evidence that the data remained accurate.
The official creation video is available at the original link below. This August tutorial supports canvas creation, not the standalone publishing feature added in November. We could not verify full playback for this publication, so it is provided as an original-video link.
Google Workspace official video: create interactive dashboards and apps in Sheets
4. Distinguish Copy link from Publish canvas
The existing Copy link follows the source spreadsheet’s access permissions. For a separately published view, open the canvas toolbar menu and choose Publish canvas. Keep Google’s current publishing demonstration open beside the instructions:
Open Google’s official publishing demonstration and announcement
That demonstration uses Google’s roadmap example. It shows audience access, Automatically republish when changes are made, Publish, and the subsequent Copy link and Stop publishing controls. We link to the original platform without downloading and rehosting the animation. It is neither our event schedule nor a successful publication from our account.
Publishing requires edit access to the source canvas. Read the audience options actually displayed: they depend on the account and organizational policy. Publishing to an organization and publishing to the entire web are different choices. A canvas may have a broader audience even when the source file remains limited to a small team.
For this fixed practice schedule, start with automatic republishing disabled, producing a static view. Decide separately whether a live schedule needs automatic updates. After Publish, preserve the address from Copy link separately from the spreadsheet address. Label bookmarks or notes Source sheet and Published canvas so you do not send the wrong address to attendees.
5. Verify the recipient, update behavior and stopping publication
Open the published address using a separate account without source-file access. An organization-only audience still requires an eligible organizational account; an incognito window alone does not test that membership. If the page opens, try its track filter, compare the session values and confirm that the recipient cannot edit the data. If access is denied, inspect the canvas audience rather than immediately making the source spreadsheet public.
These are reader completion checks, not results we have passed:
| Check | Completion condition |
|---|---|
| Addresses | Source-sheet and published-canvas links are stored separately |
| Content | Dates, times and tracks match all three source sessions |
| Read-only behavior | The recipient can filter without modifying source data |
| Updates | Changes follow the selected static or automatic-republishing mode |
| Stop | After Stop publishing, the recipient link is checked again |
To test automatic republishing, change only one harmless fictional session name and refresh the recipient’s page. We have not measured propagation time and do not promise updates within a particular number of seconds. Restore the original value after checking. Use Stop publishing for an unneeded practice publication: removing a bookmark does not stop access. Reopen the source in Drive and confirm that the existing canvas can be found through the bottom canvas menu.
6. A restricted file does not mean hidden data
Google’s help page states that underlying data is sent directly to the browser and viewers may be able to access it. Inability to open the source file does not prove that private columns or other data are protected. Do not use a canvas as a security layer that hides confidential source data behind a polished view. Start with a separate file containing only rows and columns you are prepared to expose.
If the menu is missing, check English support, plan eligibility and rollout timing, Drive storage, mobile-app use and the administrator’s publishing policy. The help page also lists disabled download, copy or print permissions as a limitation. Changing one condition does not guarantee access, and this guide does not bypass organizational restrictions. Treat your schedule as complete only after checking generation, publication and the recipient’s actual view in your own environment.