What is Higgsfield? Planning a short shot from one image
Understand the image, camera preset and prompt in Higgsfield DoP, then decide whether a generated shot fits your project.
Last updated
Menus and supported features can change. Compare the source-check date below with your current app version.
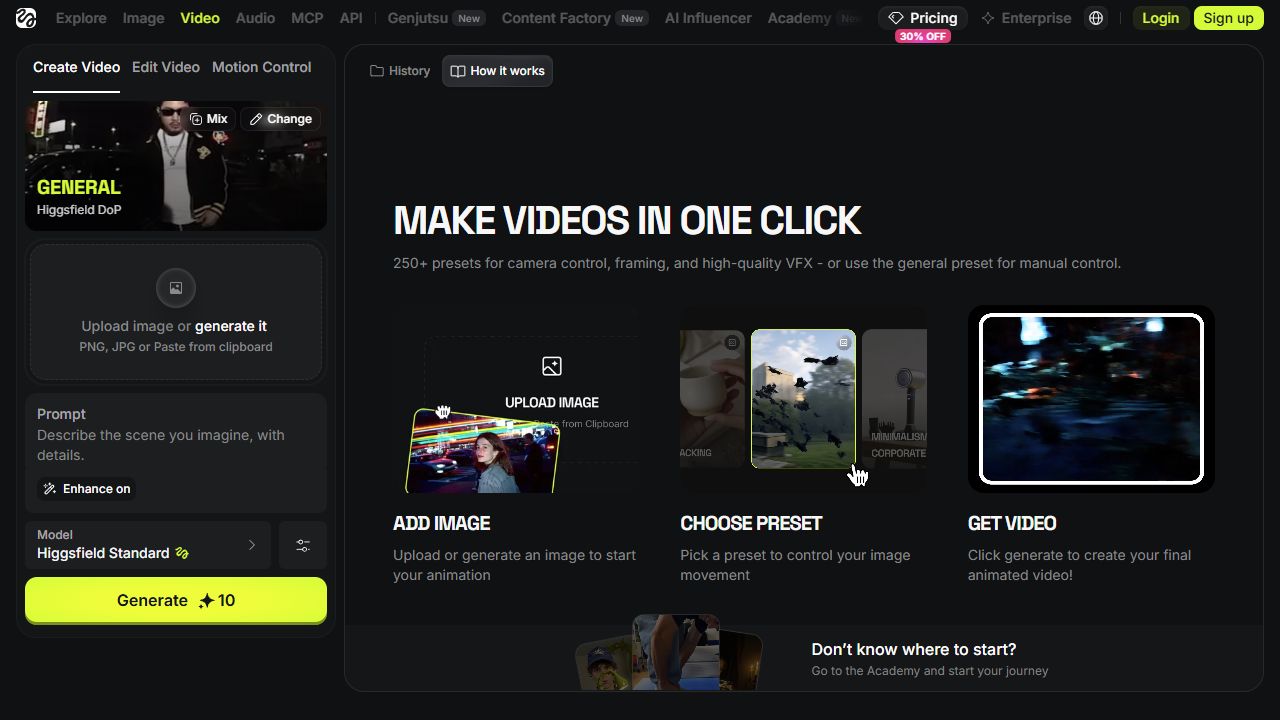
A still image may be ready while the opening shot of your video still feels unfinished. Higgsfield offers an image-to-video route for exploring motion from that starting point. This introduction focuses on Higgsfield DoP and a single-image shot, the task covered in our walkthrough, rather than every product inside the platform.
This is based on official information checked on October 26, 2026. We inspected the interface for the tutorial but did not run a paid generation or measure output quality or speed. An interface example is not evidence that our proposed shot succeeded.
Give each input a clear job
The official DoP guide describes a starting image, a motion or effect preset and a scene prompt. It identifies the model in the selector as Higgsfield Standard. Think of the image as the visual subject, the preset as the movement to explore and the wording as your scene intention.
For a mug photograph, decide whether the handle, rim and printed details must stay consistent. These are proposed inspection criteria, not findings from a generated sample. A pleasing camera approach alone may not satisfy a task that requires an exact product representation.
Start with one purpose for one shot
“A gentle approach toward a mug on a desk” gives you a specific result to assess. Combining walking, object handling and background changes makes it harder to explain which part needs revision. A small first task helps you separate the desired action from decorative changes.
Consider whether you need generated scene motion at all. If showing a larger crop of the original photograph is enough, an ordinary image movement in your existing editor may meet the brief. If a logo or product shape must remain exact, establish that requirement before treating a generated image sequence as usable evidence.
Prepare material you can evaluate
Keep a permitted, clear source image, one intended movement and a note about the destination of the clip. Save the source separately. Label attempts with a date or sequence so you can relate the result to the settings that produced it.
The mug in our walkthrough is an editorial practice choice. It does not imply an observed generation result. Starting without faces or complicated lettering can reduce the number of details you need to inspect during a first exercise.
Decide how much iteration the task deserves
Higgsfield’s credit guide says generation costs depend on settings such as model, resolution and duration; the Generate button displays the cost before confirmation. A photographed number in a tutorial is not a fixed price for every account or future attempt. Check it again when changing settings.
Set a stopping rule before experimenting. For example, require a recognizable subject, the intended direction of motion and a usable beginning and ending. Watch the entire clip rather than selecting one attractive frame. A result can look promising in a still preview while failing the actual brief during playback.
Define a useful first outcome
The first goal is a short shot you can explain and evaluate against your own image and intention. Keep the source and received clip together, note the usable section and inspect it in the destination edit. That gives you a concrete basis for another attempt or a decision to use a simpler treatment instead.
Continue with the step-by-step task guide for the interface instructions.
Sources & further reading
- https://higgsfield.ai/creator-hub/help-center/getting-started/official-higgsfield-platforms
- https://higgsfield.ai/creator-hub/help-center/account/how-do-i-recover-access-to-my-account
- https://higgsfield.ai/creator-hub/help-center/getting-started/how-do-i-create-my-first-generation
- https://higgsfield.ai/creator-hub/help-center/ai-models/how-do-i-use-dop
- https://higgsfield.ai/creator-hub/help-center/credits/how-credits-work
- https://higgsfield.ai/creator-hub/help-center/troubleshooting/generation-is-stuck-or-failed
- https://higgsfield.ai/blog/generate-ai-videos-from-chatgpt
- https://higgsfield.ai/pricing