faster-whisper tutorial: save an audio transcript with timestamps
Learn how to use faster-whisper to transcribe audio files on CPU with INT8 quantization and save them with timestamps.
Last updated
Menus and supported features can change. Compare the source-check date below with your current app version.
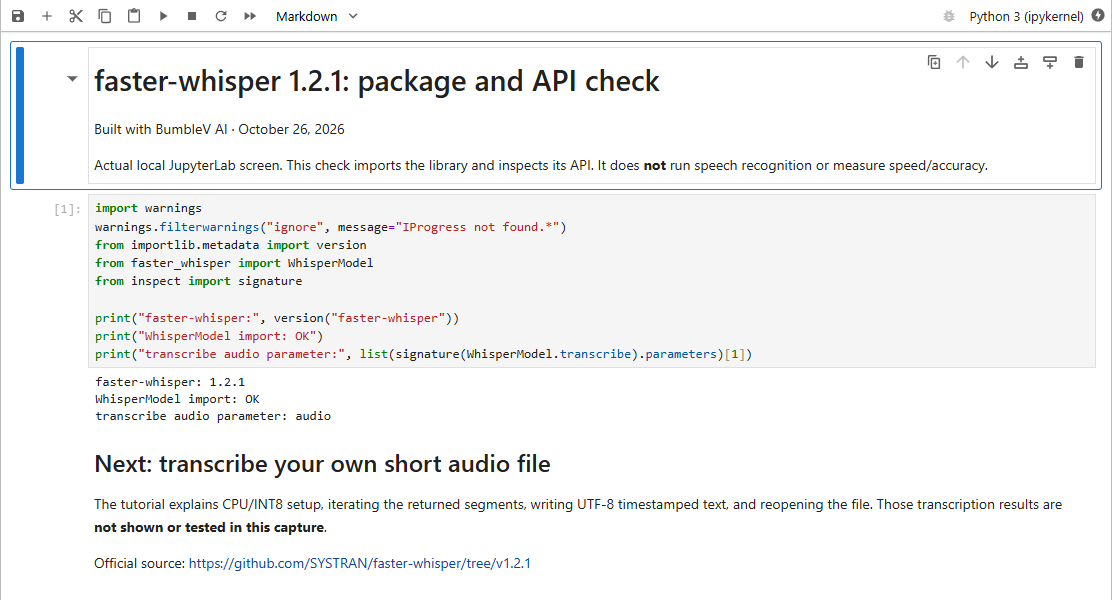
The file this tutorial aims to create
This article covers the faster-whisper v1.2.1 official release, published on 2025-10-31 (UTC). The source documents were checked on 2026-10-26. This existing stable release was selected for a task explicitly requested by the reader. It is not presented as a product or update released within the last 30 days.
This documentation-based, untested transcription walkthrough uses faster-whisper 1.2.1 on CPU with INT8 computation to obtain timestamped speech segments. It then adds ordinary Python code to write those segments to transcript.txt in UTF-8. Model initialization and the segment fields come from the official README F4, F7. The file-writing layer is an editorial wrapper, not a built-in subtitle-export feature.
The real JupyterLab illustration in the article shows a package-version and API-import check. It does not show this audio task being completed. Example input below is a specification for a recording you will prepare, not a supplied audio file or an observed recognition result. Keep a copy of the original recording so you can check every saved passage against it.
Recording to prepare, not a supplied audio file:
sample.wav — a short recording you own, containing:
Today we are checking whether a saved transcript matches the original audio.
Output to create with the tutorial script: transcript.txt (UTF-8).
1. Prepare Python, a folder and your audio
The selected README requires Python 3.9 or later F6. Create a separate working folder and put a short audio file you are entitled to process in it as sample.wav. Use a genuine audio file rather than renaming another format’s extension. The Python library is used through code; there is no product menu or web upload control in this workflow.
The README describes fetching a converted model from Hugging Face Hub when loading by a model-size name D2. Prepare network access and local storage for that step rather than assuming the first run can be offline. This tutorial chooses small as an example, not as a universally appropriate model. The relevant CPU/INT8 initialization is documented F4; no GPU or CUDA configuration is part of these steps.
2. Install the selected package version
Using an isolated environment is an editorial setup suggestion to avoid mixing this experiment with another project’s packages. In the working folder run python -m venv .venv. Activate it in Windows PowerShell with .\.venv\Scripts\Activate.ps1, or on macOS/Linux with source .venv/bin/activate. If your Python executable is named python3, use that command instead. Where activation is restricted, address the environment’s Python executable directly rather than changing security settings.
The official installation route is the PyPI package F3. The version suffix below keeps the selected release explicit instead of silently choosing a newer package.
python -m pip install faster-whisper==1.2.1
python -c "from importlib.metadata import version; print(version('faster-whisper'))"
The expected result of the second command is 1.2.1. If another value appears, or the module is not found, check that installation and execution use the same interpreter. The faster-whisper README says PyAV bundles the FFmpeg libraries used to decode audio, so a separate system FFmpeg installation is not required for its documented setup F6. That does not remove the need to satisfy the package’s other environment requirements.
3. Save and run the complete wrapper
Create transcribe_to_text.py in your editor and save the full script below. It checks the input path, initializes the documented CPU/INT8 configuration and consumes every returned segment F4, F5. Opening a UTF-8 output file and reading it back are ordinary Python additions made for this tutorial.
from pathlib import Path
import sys
from faster_whisper import WhisperModel

audio = Path(sys.argv[1])
if not audio.is_file():
    raise SystemExit(f"Audio file not found: {audio}")

model = WhisperModel("small", device="cpu", compute_type="int8")
segments, info = model.transcribe(str(audio), beam_size=5)
output = Path("transcript.txt")
with output.open("w", encoding="utf-8", newline="\n") as stream:
    for segment in segments:
        line = f"[{segment.start:.2f}s -> {segment.end:.2f}s] {segment.text.strip()}"
        stream.write(line + "\n")
        print(line)

print(f"Saved: {output.resolve()}")
print(output.read_text(encoding="utf-8"))
From the working folder run python transcribe_to_text.py sample.wav. To use an audio file elsewhere, replace the second argument with its actual path and quote it if it contains spaces. transcript.txt is created in the directory from which you run the command. The wrapper opens that path in w mode, so it overwrites an existing file with that name. Copy a transcript you need to retain before running it again; this behavior belongs to the example code, not to a built-in file manager.
4. Inspect the expected result and completion criteria
The expected result is a sequence of lines containing a segment’s start time, end time and recognized text, followed by the saved-file path and the text read back from disk. The README demonstrates the underlying timestamp fields F7. Actual words and segment boundaries depend on your audio and the model output; no sample recognition result is claimed here.
Completion criteria include more than an error-free exit. Close and reopen transcript.txt in a text editor. Check that characters remain readable, that the beginning and end of the recording are represented, and that timestamped lines correspond to the relevant audio. Listen for incorrect or omitted words and correct them before using the transcript as a record. An empty file is not success just because it exists. Also verify that the generator was consumed: the README says transcription begins when segments is iterated F5.
5. Troubleshoot the boundary that failed
Audio file not found comes from the wrapper’s own path check. Compare the current directory, the filename and the argument you supplied. For an import problem, return to the package-version command before changing the model settings. For a model-download problem, check network access and local storage. If you only displayed the generator object, return to the loop rather than concluding that the library produced no speech F5.
If resource use is a problem, assess a smaller documented model with the same recording, and check the resulting text instead of assuming accuracy is preserved. This article promises no duration or accuracy level. Public source code does not establish free hosted inference or unrestricted model terms; confirm the terms and resources involved. Once the basic saved-file check is reliable in your environment, consider a separate small experiment with the README’s word-level timestamps or VAD options D2.
Original BumbleV reading guide illustration; not a product screenshot or a result from our testing. Official release behind this illustration · CC BY 4.0 · 2026-10-26
Sources & further reading
- https://github.com/SYSTRAN/faster-whisper/releases/tag/v1.2.1
- https://raw.githubusercontent.com/SYSTRAN/faster-whisper/65882eee9f5cdbeeb2d877f1131d48cf241b327d/README.md
- https://raw.githubusercontent.com/openai/whisper/86098128c0b4f24f0e2aa2994de830614b474227/README.md
- https://api.github.com/repos/SYSTRAN/faster-whisper