LightCraft: what it does and what to check first
Three photos from the same outing can look like three different sets when their exposure is uneven.
Last updated
Menus and supported features can change. Compare the source-check date below with your current app version.
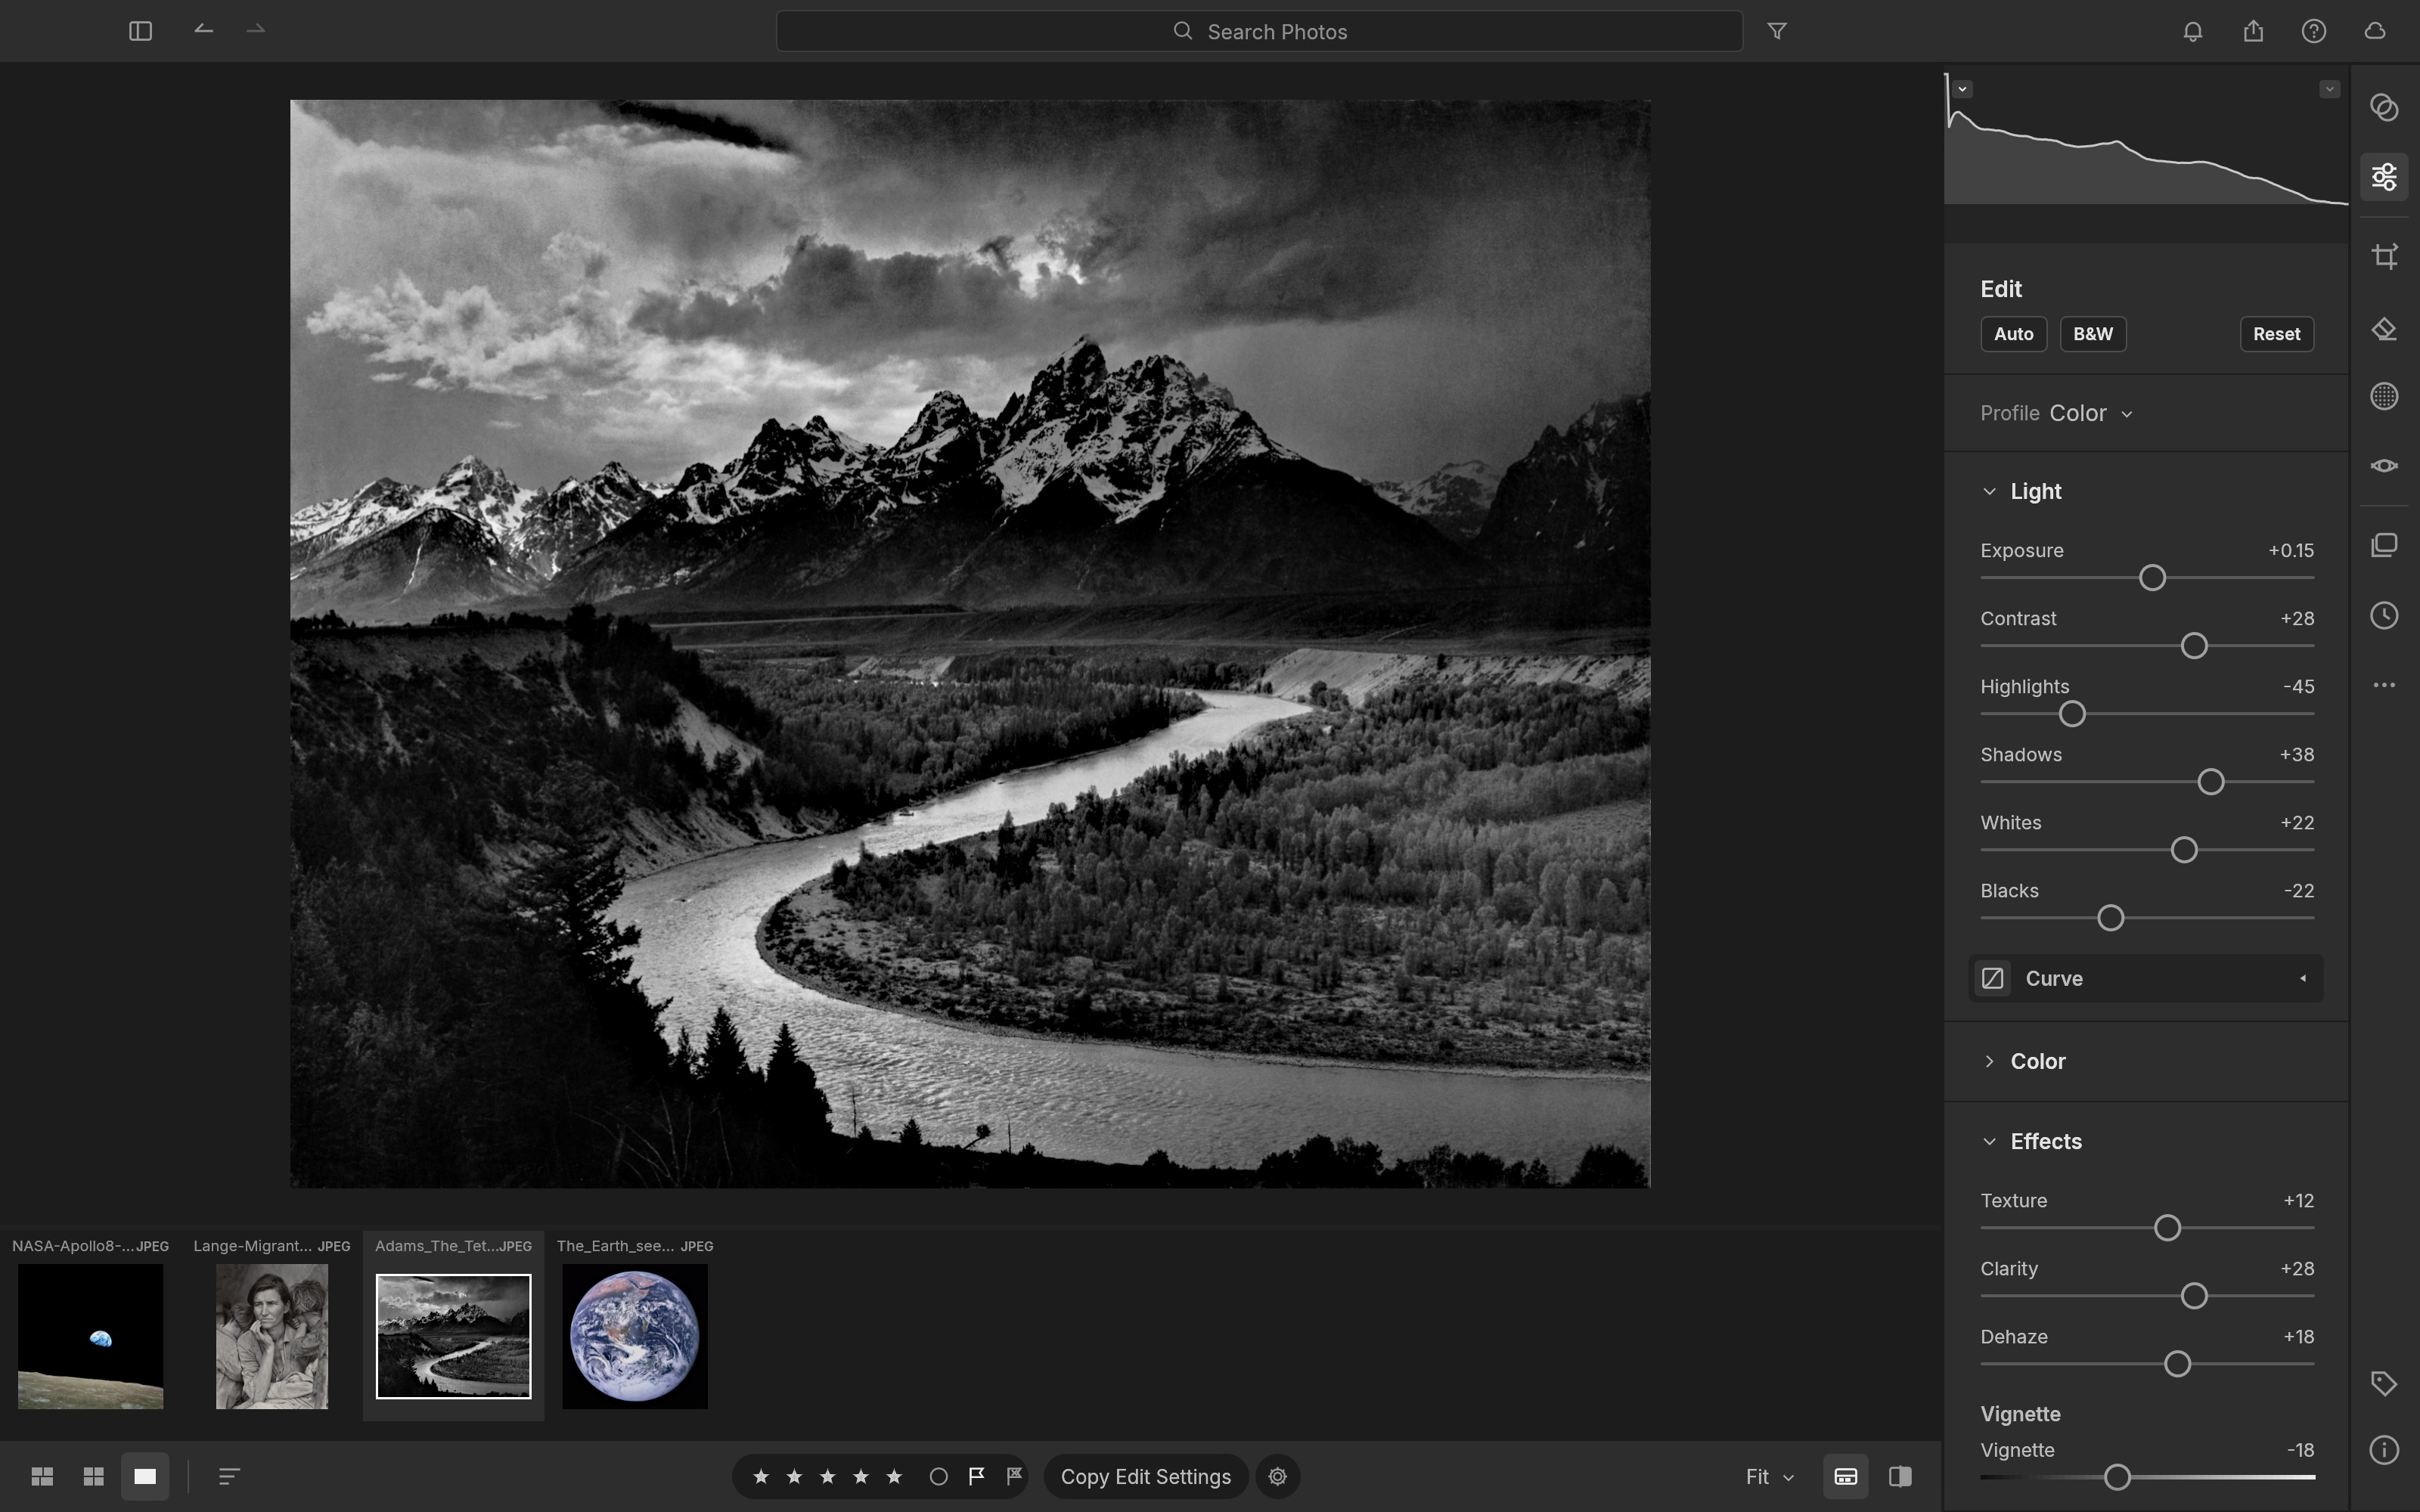
Three photos from the same outing can look like three different sets when their exposure is uneven. LightCraft combines a local photo library with adjustment tools. I would start by choosing a reference photo, correcting it and checking the other two after synchronising settings. Applying the same numbers is convenient, but it is not the same as producing a consistent-looking set.
The checked material describes alpha / in development. I have read the public documentation; I have not installed and run this app for a hands-on review.
A look at the screen
| Where to look | What it does |
|---|---|
| Library and albums | Choose the set and mark a reference photo. |
| Light and Color | Adjust exposure, white balance and colour. |
| Filmstrip | Move between the photos and check each result. |
What the documentation describes
- Organise groups of photos with a library, albums, ratings and filters.
- Adjust exposure, tone curves, colour and masks, then copy or synchronise adjustments to other photos.
- The documentation describes JPEG, DNG and multiple RAW formats, with camera-specific support to check separately.
What interests me beside Lightroom
Local organisation, copying edits and camera-specific RAW handling are the useful starting points for a Lightroom comparison. RAW files hold camera source data, so opening a filename is not enough: it matters which data was read. Library management, ordinary adjustments and generative editing should not be treated as one interchangeable feature.
The developer describes free, open-source, local work. Open source means the code is available to inspect. I have not measured a speed or total-cost advantage. For Lightroom, check the official product and plan information for the terms that apply in your region.
The limitation I would check first
The README describes gaps in camera colour calibration, some compressed RAW formats and display HDR. Some subject/sky selection uses classical heuristics, meaning predefined rules rather than the same AI-mask behaviour as Lightroom. Check your camera model and compression format. A RAW file may use an embedded preview instead of decoded sensor data.
A small first task
For the first exercise, let’s match the brightness of three photos and export a batch. Prepare: Three JPGs from the same photo set, ideally with different brightness. If RAW handling is your goal, also prepare a JPG/RAW pair from your camera.
Check the official app page and release downloads for a build matching your operating system and CPU. If there is no suitable installer or the app does not start, read Get started/Quick start and known issues in the official README. Record the app version and OS when you try the task.
The separate tutorial gives the menu sequence and an expected result. It is a documentation-based exercise, not a claim that I completed it. AI-assisted development, an app’s built-in AI features and an agent operating existing functions need to be distinguished when judging an automation claim.
Keep the working file and the delivery file
Keep the original photos, the saved adjustment information and the exported JPEGs separately. Record camera model and source format for a RAW test. A good-looking JPEG does not establish that a compressed RAW was processed from sensor data. Reopen the saved editing state and adjust just one image; the other originals and edits should remain identifiable.
If the result differs
If synchronisation makes the set look less consistent, check each source exposure first. Investigate a colour problem separately from a brightness problem. For a RAW issue, consult the source’s raw-parity documentation and compare the camera JPG with the RAW. Do not record success with a replacement JPG as success with that RAW file.
What I would verify before a bigger job
- Process matching camera JPG/RAW samples with controlled settings and compare colour and exposure.
- Record import, organisation and export time for the same set.
- Check whether compressed RAW uses sensor data or an embedded preview.
A few JPG or DNG photos are a manageable starting point for adjustments and batch export. Camera-specific colour accuracy and moving an existing library need their own samples. The number of formats in a feature list is less informative than whether your actual file is read and edited as intended.
Separate selection from correction: a blurred or very dark original will not become equivalent to the others merely because the settings match. Note why you chose the reference. In a larger batch, still check output count, filenames and the brightness of each image rather than assuming synchronisation handled every difference.
Introduction · Task tutorial · Comparison: documented differences
Sources & further reading
- https://getartcraft.com/apps/lightcraft
- https://github.com/storytold/lightcraft/blob/main/README.md
- https://www.adobe.com/products/photoshop-lightroom.html
- https://github.com/storytold/lightcraft/blob/a4b53b28cc52b68d9f5bdca09fa5666cdad5ad5f/README.md
- https://github.com/storytold/lightcraft/blob/a4b53b28cc52b68d9f5bdca09fa5666cdad5ad5f/crates/ui-egui/src/menus.rs