EffectCraft tutorial: animate a three-second title entrance
A documented, six-step guide to animate a three-second title entrance, with source screenshots, editable files and output checks.
Last updated
Menus and supported features can change. Compare the source-check date below with your current app version.
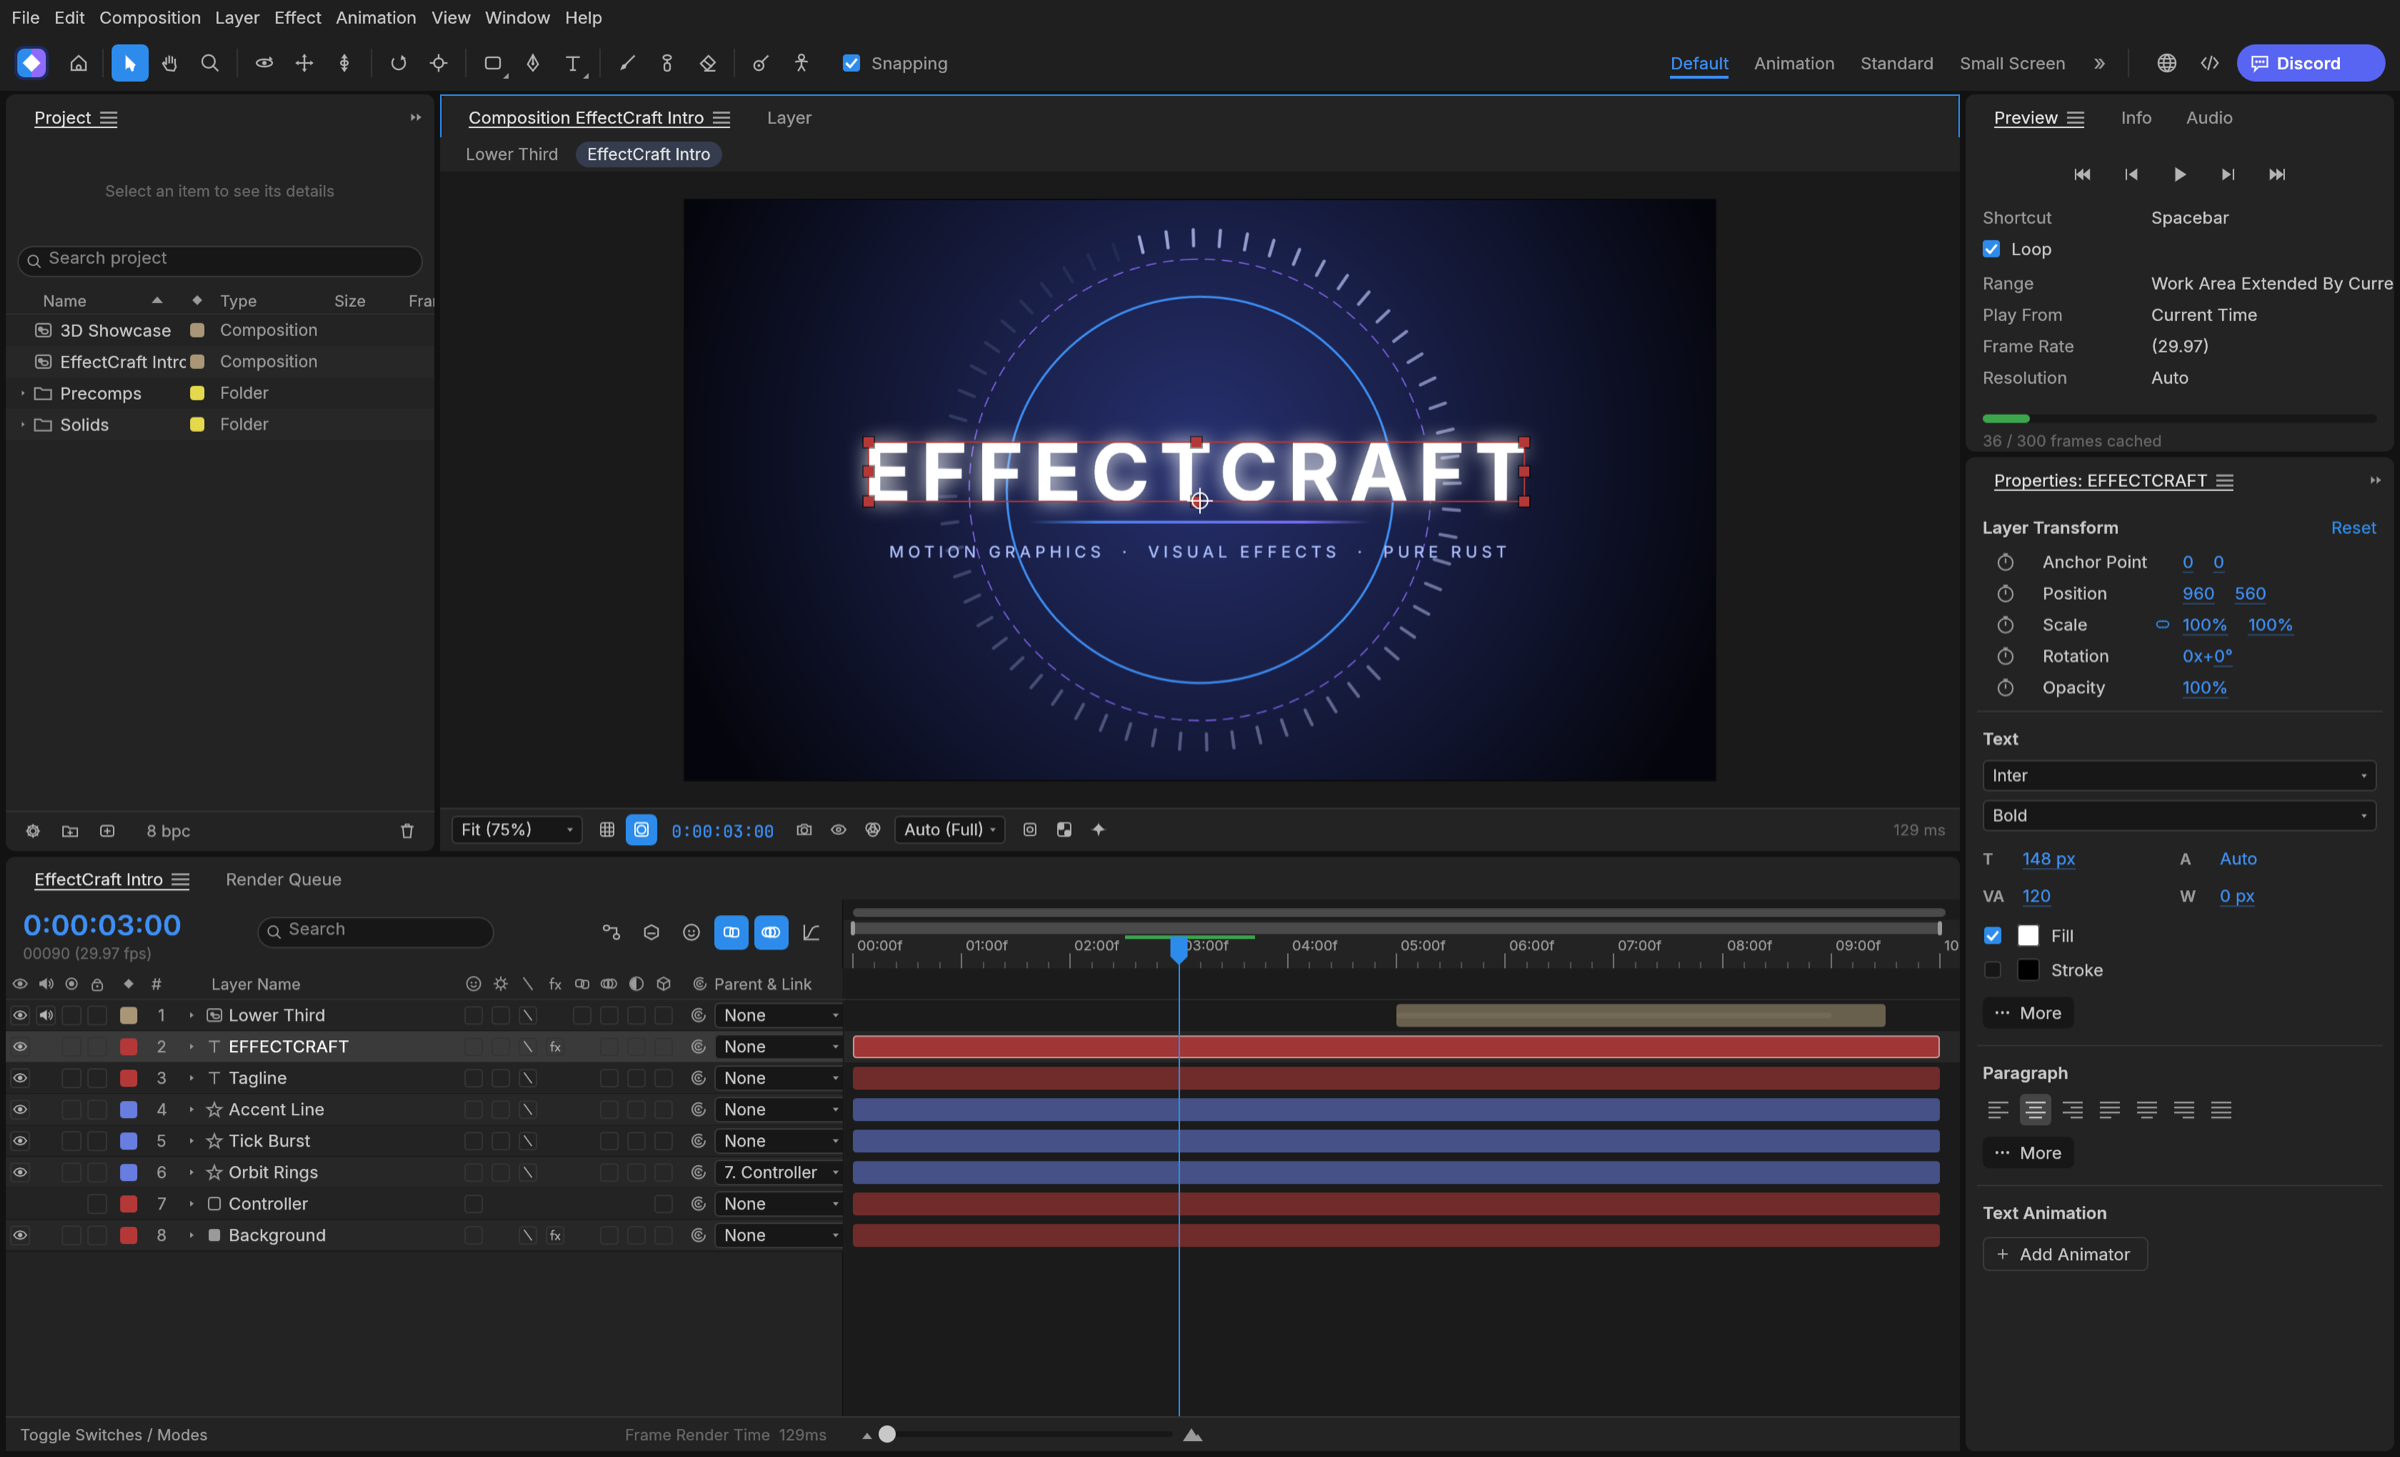
Let’s work towards one clear result: animate a three-second title entrance. The aim is to keep something you can revise and something you can actually share, rather than learn every feature at once.
This walkthrough follows the developer’s public screens and menu descriptions. I have not run it myself, so the outputs below are expected results to verify, not a tested finished example. Keep the English menu names visible while following along; they also help when your installed version differs.
Before opening the project
Prepare: A short title such as Built with BumbleV AI and a plain background. Start with opacity alone so the timing is easy to inspect.
Check the official app page and release downloads for a build matching your operating system and CPU. If there is no suitable installer or the app does not start, read Get started/Quick start and known issues in the official README. Record the app version and OS when you try the task.
Use copies for the exercise and keep originals, working documents and exports in distinguishable folders. The documented stage is alpha / in development. Check the article’s source date against your installed version if a menu or supported format has changed.
Find the relevant controls
| Where to look | What it does |
|---|---|
| Composition | See the actual title frame. |
| Timeline | Manage layers and keyframe positions. |
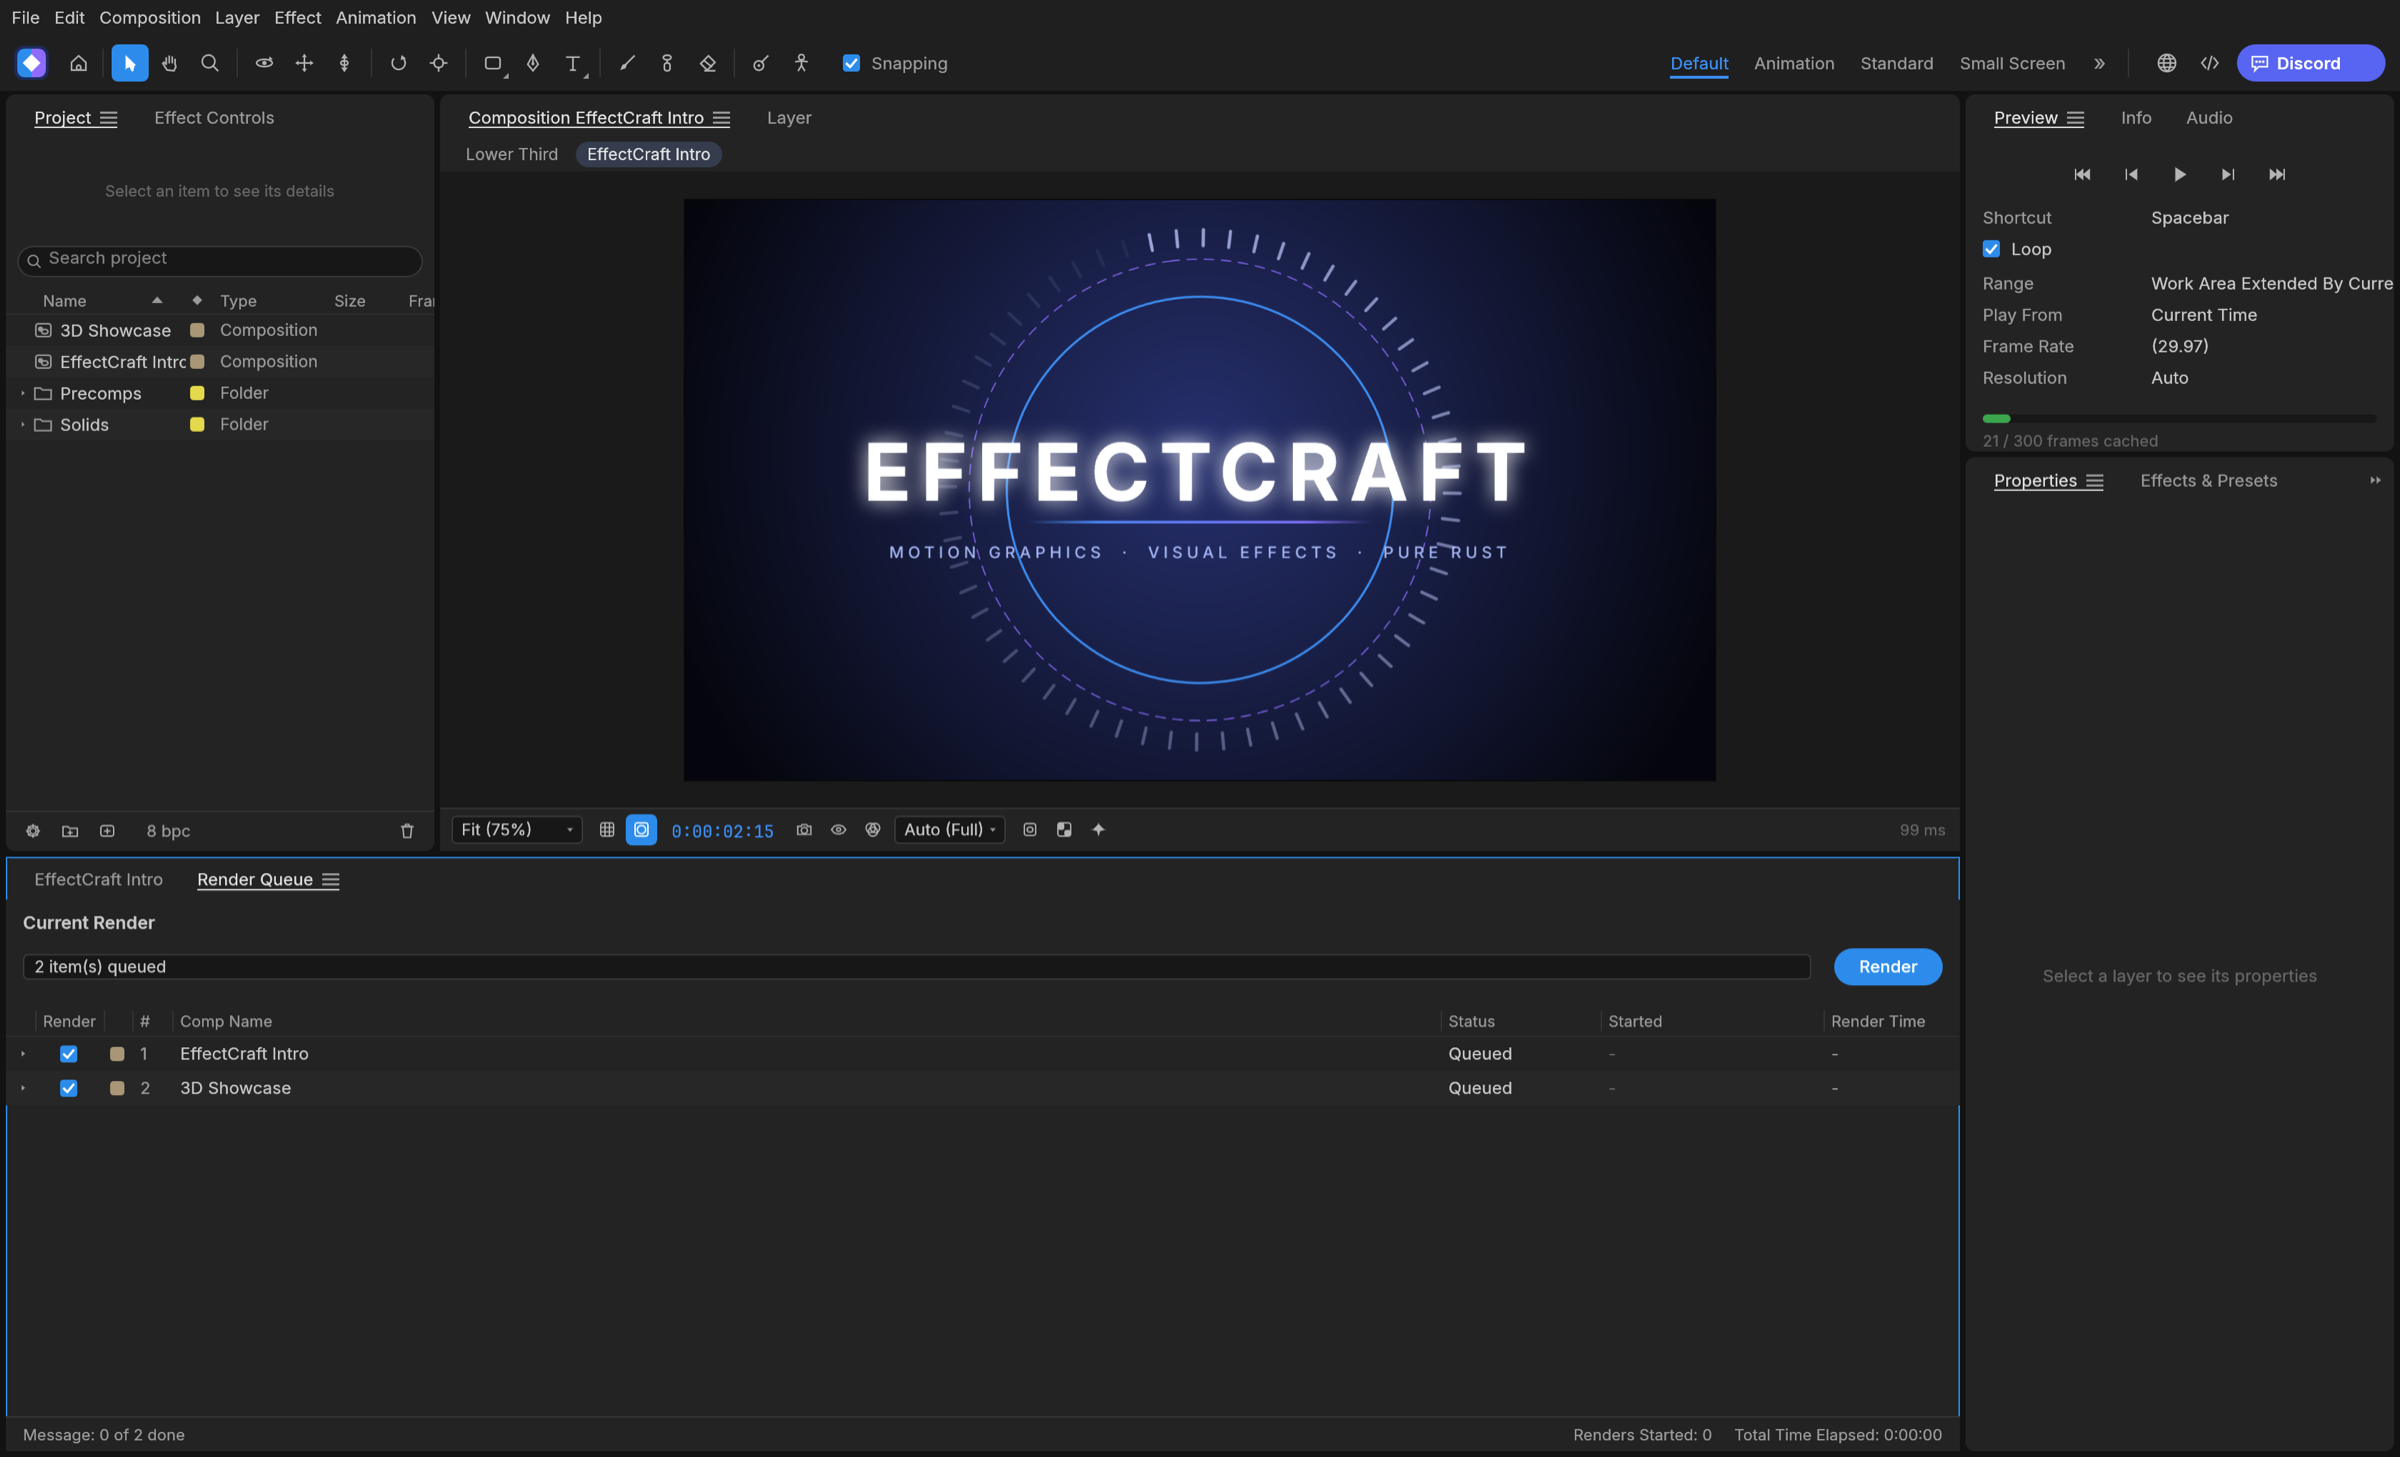
| Properties and Render Queue | Inspect text, transforms and the composition to render. |
Example settings
| Setting | Example |
|---|---|
| Composition | 1080×1080, three seconds, 30 fps |
| Title | Built with BumbleV AI |
| Opacity keyframes | 0 at time 0; 100 at one second |
| Reading time | Hold the title for the final two seconds |
Follow the task
1. Create a composition
Use Composition → New Composition… and set size, duration and frame rate. For this three-second example, keep the first second for the entrance and the final two seconds for reading.
2. Separate background and title
Put a background solid and text on different layers. In Properties, choose the font, size and alignment, then position the title in the centre or another intentional location.
3. Set the starting keyframe
Move the playhead to time 0 and add a keyframe to the title layer’s Opacity or Position. For the simple fade used here, start Opacity at 0.
4. Set the visible state
Move to one second and set Opacity to 100. Adjust interpolation in the Graph Editor if needed. Keep the title visible for the remaining two seconds instead of adding another unnecessary movement.
5. Keep the project
Use File → Save As → Save As… for the .ecproj working file. This is its own project format, not a route for directly opening an After Effects .aep.
6. Render and inspect
Use Composition → Add to Render Queue or File → Export → Add to Render Queue. Check format, path and range. In another player, inspect the three-second duration and first/last frames.
Expected output and the next small revision
Keep the .ecproj for changing text and keyframes, and the rendered file for playback. A render is not an editable composition. After reopening, adjust the title or one keyframe and confirm the other layers remain intact. If delivering Lottie, also play it in the actual destination player and inspect which effects survive.
A simple new title animation can show how layers, keyframes and output fit together. It cannot establish migration of .aep/.aepx projects or third-party plug-ins. Matching a preview is also different from matching an After Effects render under controlled settings.
If you get stuck
If the title is visible from the start or disappears abruptly at the end, check property values at the first and last times. Compare the playback range with the render range. A font or alignment problem needs separate attention from timing. Check layer selection and the playhead if text editing behaves unexpectedly.
Keep the last working copy separate from the problem file. Record the exact error and the step where it appeared. Changing several settings at once makes the cause harder to find. If you replace an input file, note that it is a different test rather than declaring the original successful.
Check before scaling up
- Compare keyframe times, interpolation and text placement in the same three-second title.
- Play the same Lottie in the actual player and inspect missing effects.
- Evaluate .aep files and plug-in-dependent work as a separate compatibility question.
Start with readable timing before adding effects. Compare keyframe times and interpolation in equal-length animations, and keep the text/font inputs identical. For a web delivery, record the player used; success in a desktop preview is not proof that every Lottie property is supported there.
Introduction · Task tutorial · Comparison: documented differences
Sources & further reading
- https://getartcraft.com/apps/effectcraft
- https://github.com/storytold/effectcraft/blob/main/README.md
- https://www.adobe.com/products/aftereffects.html
- https://github.com/storytold/effectcraft/blob/549e9d825132986d6167c1432cd3328efcbb0278/README.md
- https://github.com/storytold/effectcraft/blob/549e9d825132986d6167c1432cd3328efcbb0278/crates/engine/src/menus.rs